How to set up Terraform to manage user access to a database in AWS
Create and manage AWS IAM users and roles with Terraform
November 22, 2023 · 15 min read
Introduction
This article explains how to set up Terraform to manage user access to a database in AWS. First we'll look at how to manage access directly in AWS, then how to use Terraform to do the same thing.
The practice of access governance has become increasingly important over the last decade. Privacy laws are becoming more stringent. Businesses are running more of their infrastructure on the cloud, distributed worldwide. The moral, reputational, legal, and financial costs of exposing customer data are massive. Using Terraform to configure, encapsulate, limit, and audit access to your resources can help with this challenge.
Terraform has several benefits over manual infrastructure changes. It allows you to:
- Manage infrastructure as code (IaC).
- Across multiple cloud providers in the same language.
- Keeping an auditable log in Git of infrastructure changes.
- With collaborative editing and approval.
- To be deployed automatically, with no human error, and a plan that can be reviewed before execution.
- Repeatably with modules, state management, and version control.
Whether you want to do it manually, use Terraform, or use Abbey, our access governance platform, this guide will help you. Read through the whole thing, or jump to the relevant section below.
- Prerequisites
- A few definitions
- Configure database access in AWS IAM manually
- Use Terraform to manage users
- What is Abbey and how does it make access to data easier?
- What are the benefits of Abbey over using Terraform alone?
Prerequisites
To follow this tutorial, you'll need:
- An AWS account. Free tier is fine. If you don't have an account, sign up here. AWS DynamoDB is always free to store 25 GB. Completing this tutorial will cost you no AWS fees.
- Docker version 20 or greater. Docker allows you to run all commands in this tutorial, whether you're on Windows, macOS, or Linux. You're welcome to run commands directly on your machine instead if you can handle differences that may occur.
A few definitions
Below are AWS access management concepts that are used throughout this tutorial.
- AWS account: A collection of AWS resources (for example, databases and apps) and a fee. A small organization might have only one account, but a large organization will probably have a few, helping to encapsulate billing, resources, and team members.
- AWS user: An identity that can be used by a person or application. It uses passwords, access keys, and permissions.
- AWS group: A collection of users that can be used to apply permissions to multiple users at once.
- AWS role: An identity that is not any specific person or application, but rather one that a user can temporarily assume that grants a set of permissions.
- AWS IAM: Identity and Access Management — the service that manages all users and permissions in your AWS account.
- AWS Identity Center: Formerly AWS Single Sign On. A service to manage users across multiple AWS accounts, which AWS is endorsing over IAM as the future of identity management. We use IAM in this article, instead of Identity Center, because it's simpler to start with, using direct creation of users and roles in a single account. For a comprehensive comparison, see this article.
- AWS CloudFormation: A configuration service provided by AWS that allows you to create and configure users and applications declaratively in JSON or YAML files. Without using CloudFormation, you need to imperatively set up AWS components through the website (console) or by running commands through the AWS CLI in a terminal.
- Terraform: An application similar to CloudFormation that allows declarative configuration. However, Terraform is not created by AWS. It is a level of abstraction above AWS. Terraform can be run on any server you have access to, and uses the same configuration files to manage access on different cloud providers, including Azure, AWS, and Google Cloud. It is common to store Terraform configuration files in version control like GitHub so that configuration and access control can be collaborative, versioned, approved, and audited.
Although AWS provides CloudFormation for configuration, we recommend Terraform in this article because:
- It separates the planning and execution of your configuration changes, allowing you to see what will happen before you run your change.
- If you ever want to include a cloud service other than AWS, Terraform can manage both with the same configuration files.
- It is more powerful, with a large ecosystem, and arguably simpler configuration language.
Note that versions of Terraform after 1.5 are no longer open source. The company changed its license in August 2023. You may soon want to switch to OpenTofu, an open-source fork of Terraform that is currently working towards a stable release. Currently, OpenTofu is an exact substitute for Terraform, though they will diverge in syntax and features over time.
Configure database access in AWS IAM manually
In this section, we'll create a DynamoDB table called Person with one row, a user called Bob who wants to access it, and a role that the user can assume to access the table.
If you're already comfortable with managing users, roles, and databases in AWS, skip ahead to the section on Terraform.
Requiring the user to assume a role to access the table offers a few advantages over giving a user direct access to a resource:
- It temporarily limits permissions to the least privilege. Assuming a role will grant a user the permissions of that role but remove all their other permissions. Adding a user to a group won't have this safety.
- Credentials are safer, being temporary for a role. A user's access keys are permanent.
- Roles are centrally managed (you need to manage fewer roles than individual permissions for each user) and therefore more easily maintained and audited.
While the Terraform section of this tutorial is detailed, this initial AWS section excludes obvious actions you need to do, like clicking Done or Next.
Create a database
Create a database table:
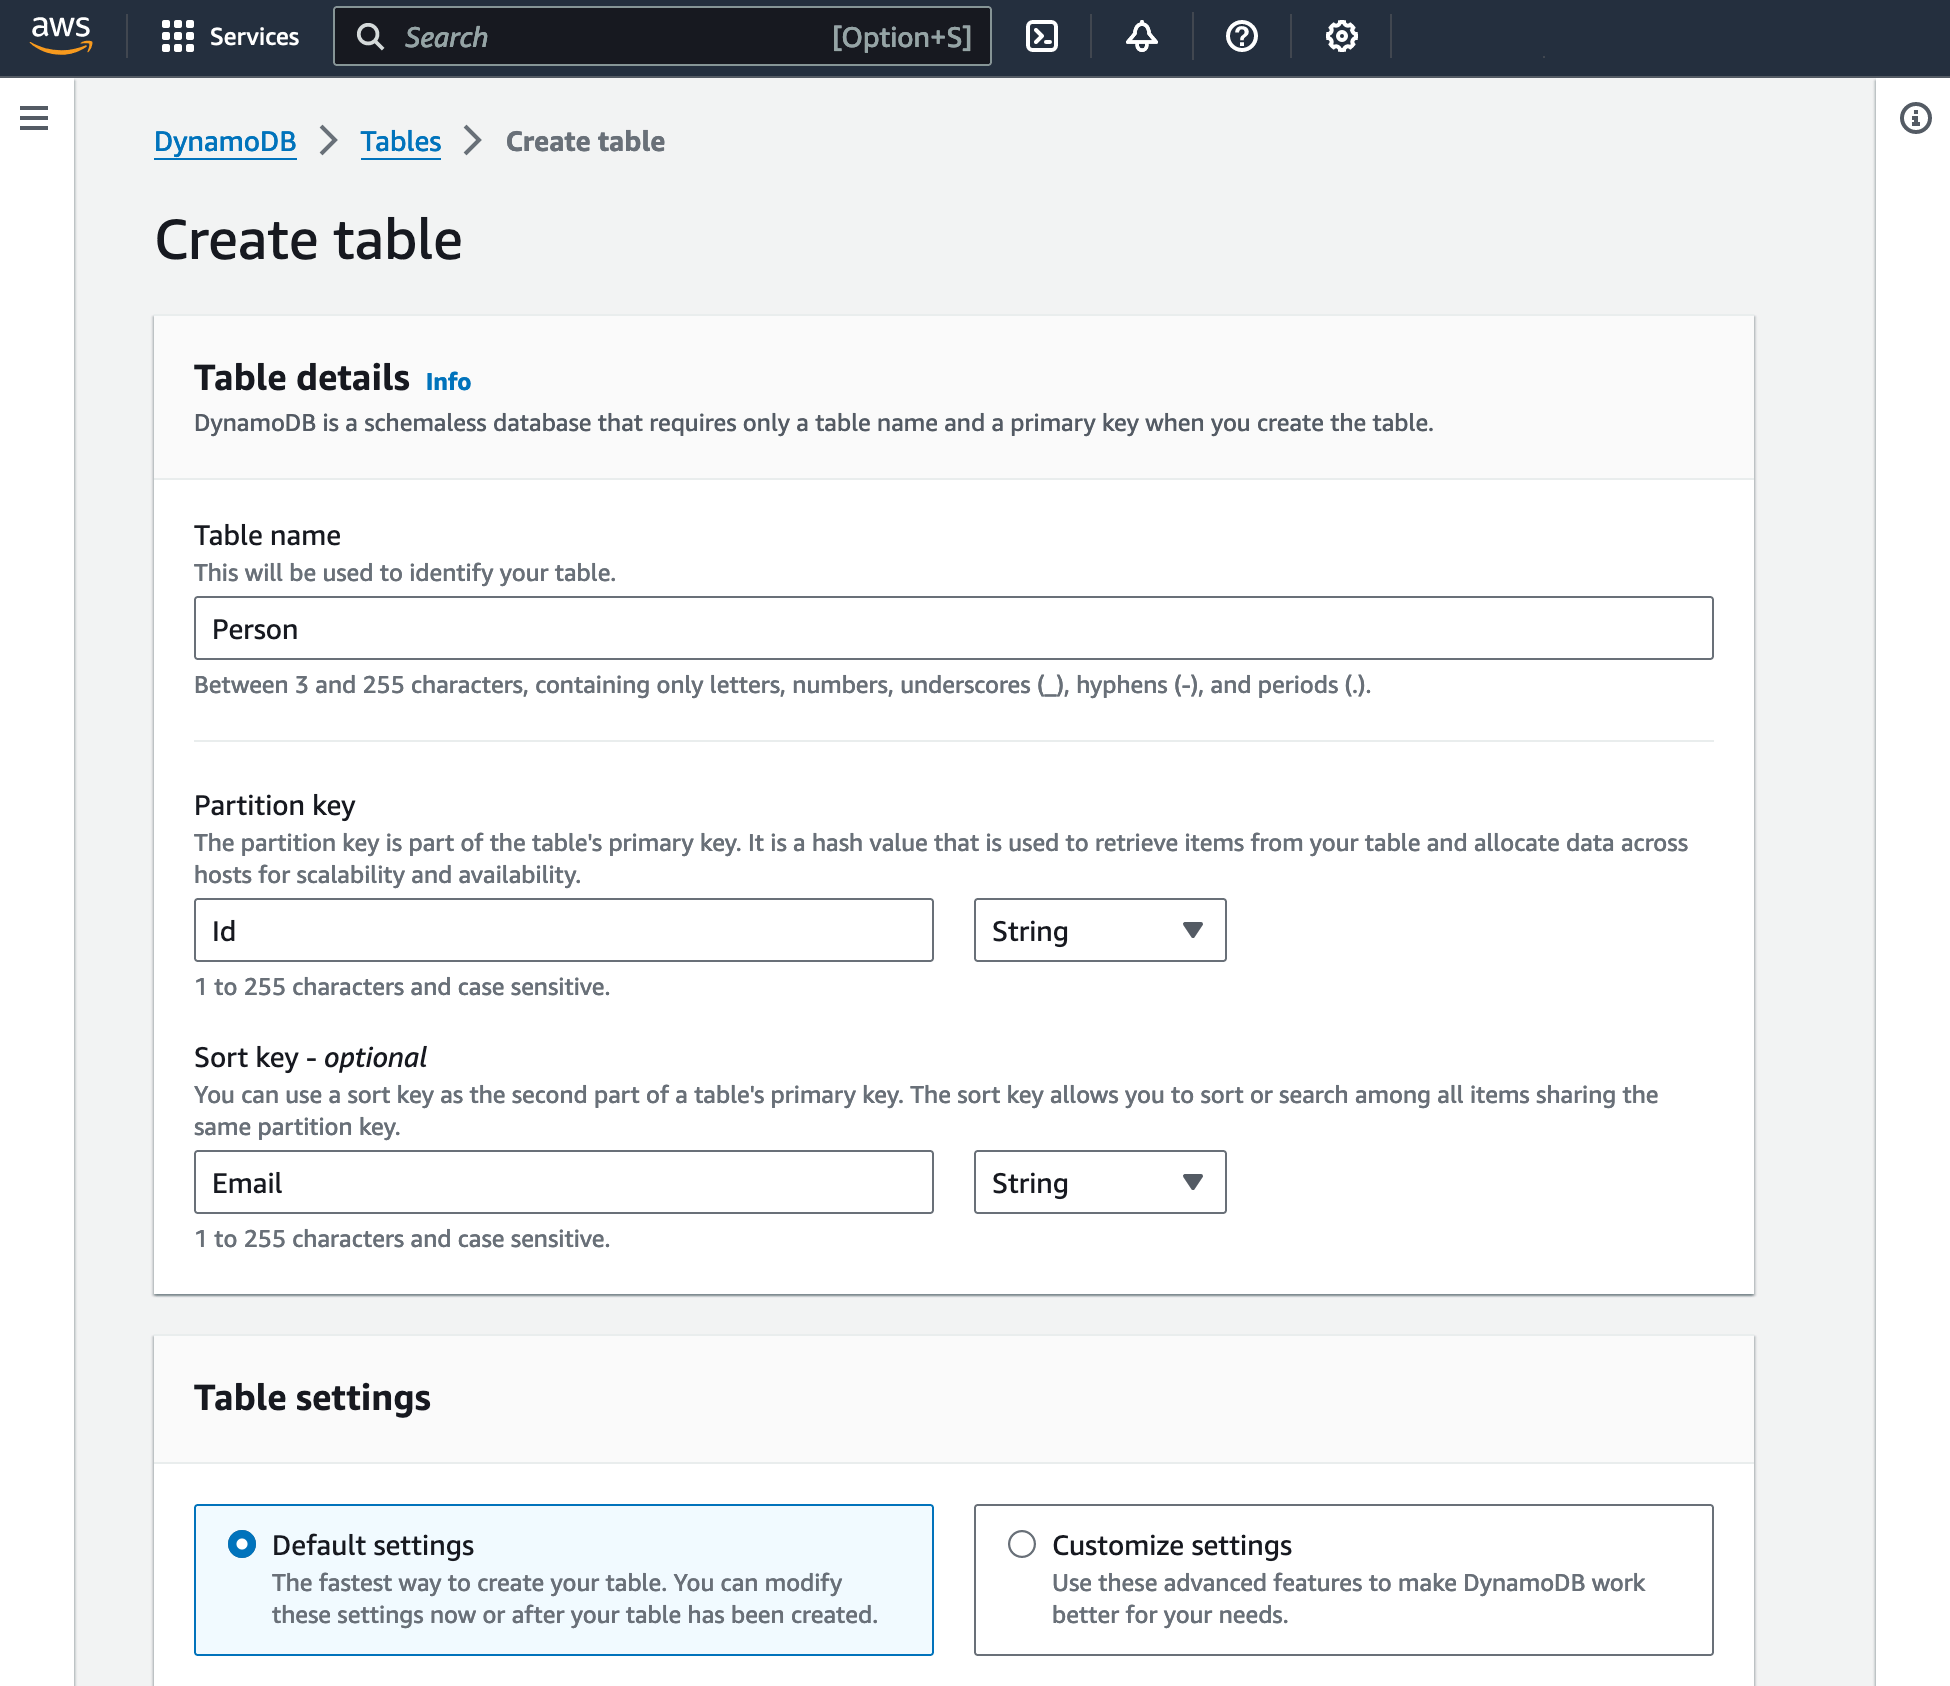
- Browse to DynamoDB in the AWS web console.
- Create a DynamoDB table called "Person" with partition key string "Id" and sort key string "Email". Use the default table settings.
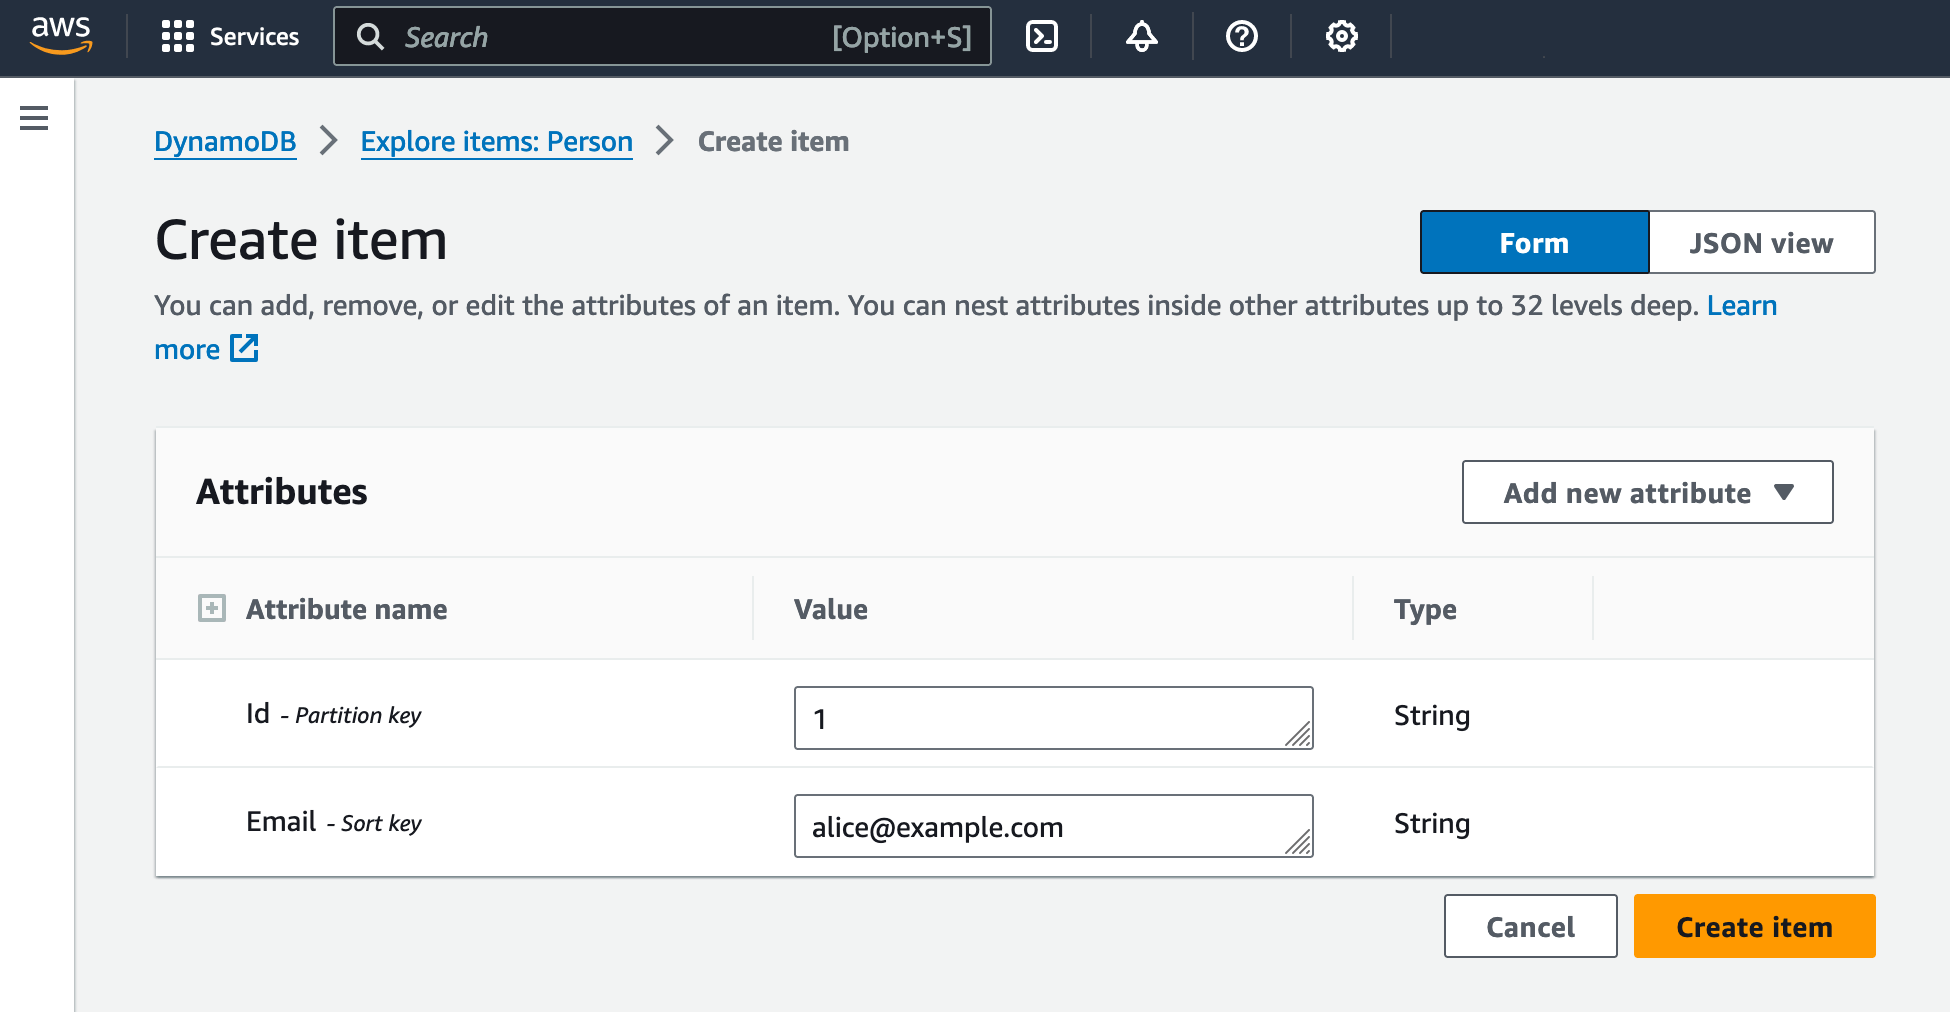
- Add a row to the table by clicking Explore table items then Create Item and entering "1" in the Id field and "alice@example.com" in the Email field.
Create a user
Create a user who has no permissions by default and will request access to read the value from the table:
- Browse to IAM.
- Create a user called
bob. - Enable "Provide user access to the AWS Management Console".
- Choose "I want to create an IAM user".
- Give the user the password
P4ssword_.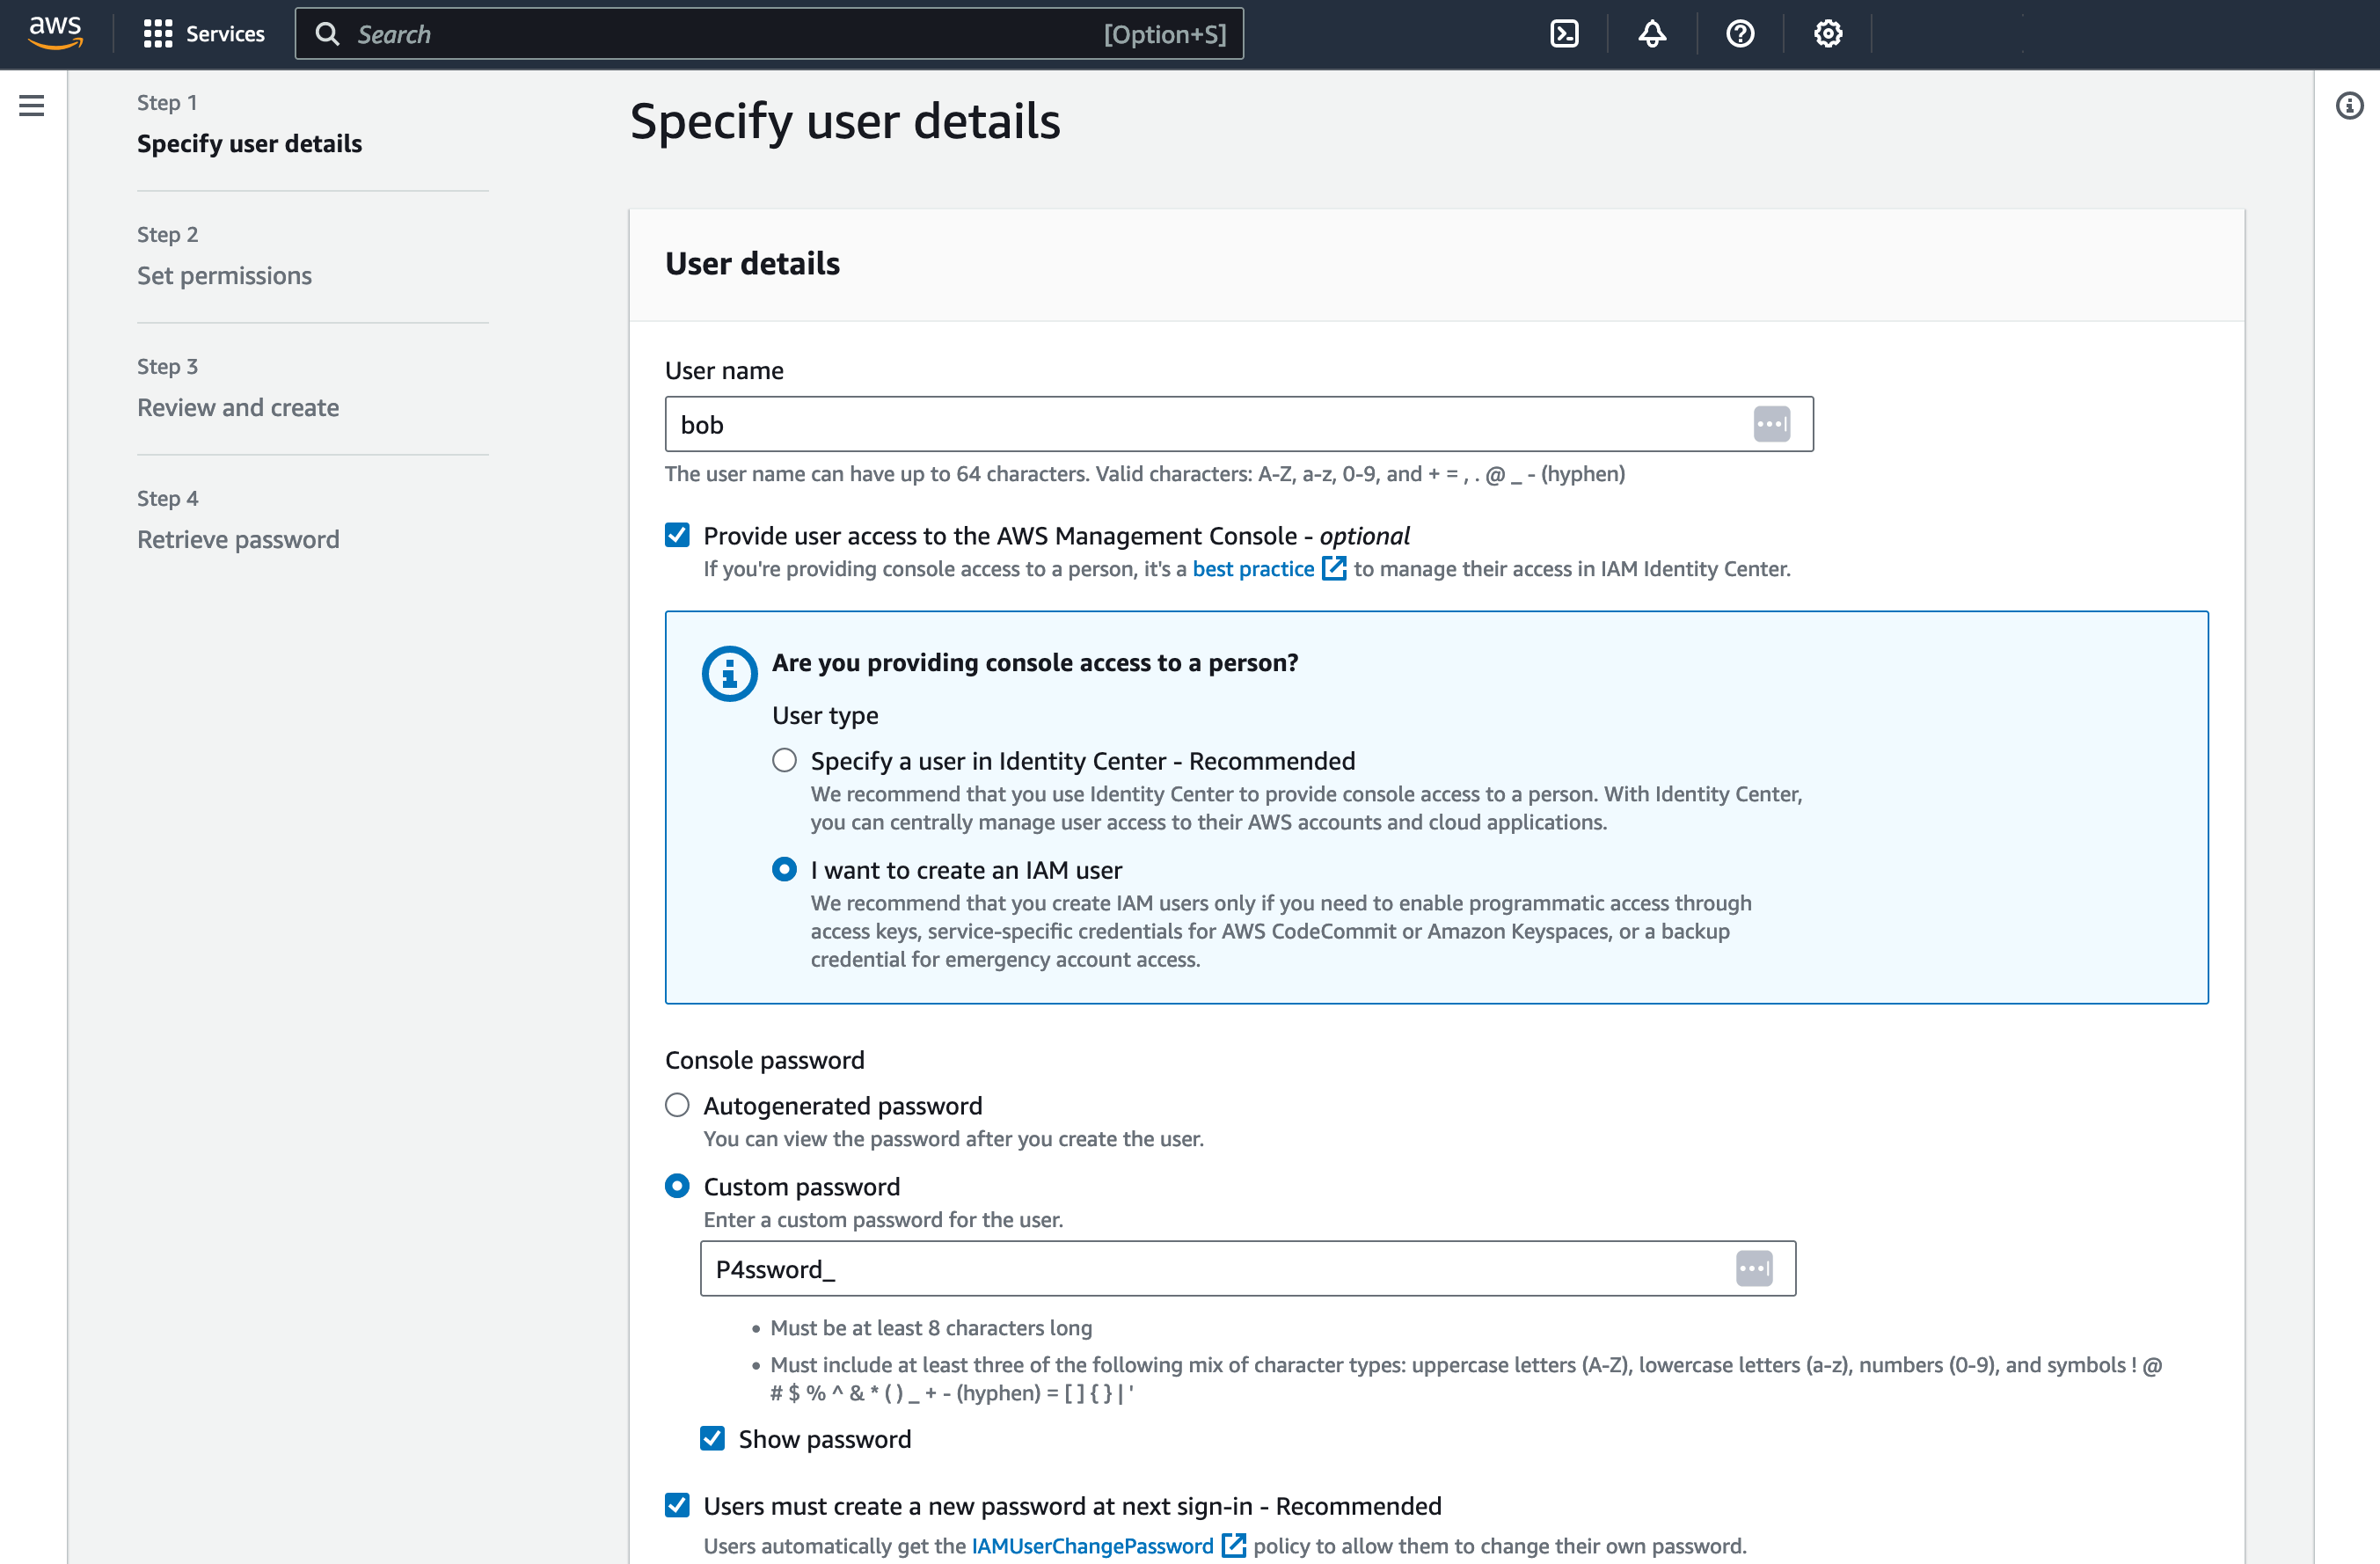
Give Bob an access key to use the CLI:
- Click bob → Create access key → Command line interface(CLI).
- Save both the access key and secret access key to use later.
Create a role
Finally, create a role with permissions to read from the Person table:
- Browse to IAM.
- Click Roles → Create role → AWS Account → This account.
- Select "AmazonDynamoDBReadOnlyAccess".
- Under Role name, enter
reader.
Now our example setup is complete and ready to test.
Request access to the database
Bob wants the latest email addresses for all customers and so wants to access the Person table. He emails an AWS administrator at his company and asks for access.
Emailing is the first thing you should change when implementing access governance at your company. Emails are hard to audit and easy to delete. As the administrator, you should ask Bob to log a GitHub issue with his request, or in a ticketing system like Jira or Redmine. When you have given him access, you can mark the issue as closed. (This provides a log of access, something that is required by standards like SOC 2, PCI DSS, and ISO/IEC 27001.)
The administrator (you) logs in to the AWS web console and gives Bob permission to assume the reader role:
- Browse to Users → bob → Permissions → Add permissions → Create inline policy.
- Select "JSON".
- Copy and paste the policy below, replacing
<ACCOUNT-ID>with your account number (found under your name at the very top right of the window).
{ "Version": "2012-10-17", "Statement": [ { "Effect": "Allow", "Action": "sts:AssumeRole", "Resource": "arn:aws:iam::<ACCOUNT-ID>:role/reader" } ] }
- Name the policy
bobreader.
The administrator then tells Bob he now has permissions to read the database.
Read the database with the user using the role
Bob logs in to the AWS website, entering the company's account identifier, his name bob, and the password P4ssword_. He does the following:
- Selects the region where the DynamoDB table is kept.
- Searches for the "DynamoDB" service.
- Clicks Tables and is told, "Your role does not have permissions to view the list of tables."
- Under his name at the top right of the screen, clicks Switch role.
- Enters his account identifier in Account.
- Enters "reader" in Role.
- Enters anything in Display Name.
- Clicks Switch role.
Bob is returned to the tables screen, and he can click the Person table, click Explore table items, and finally see Alice's email address.
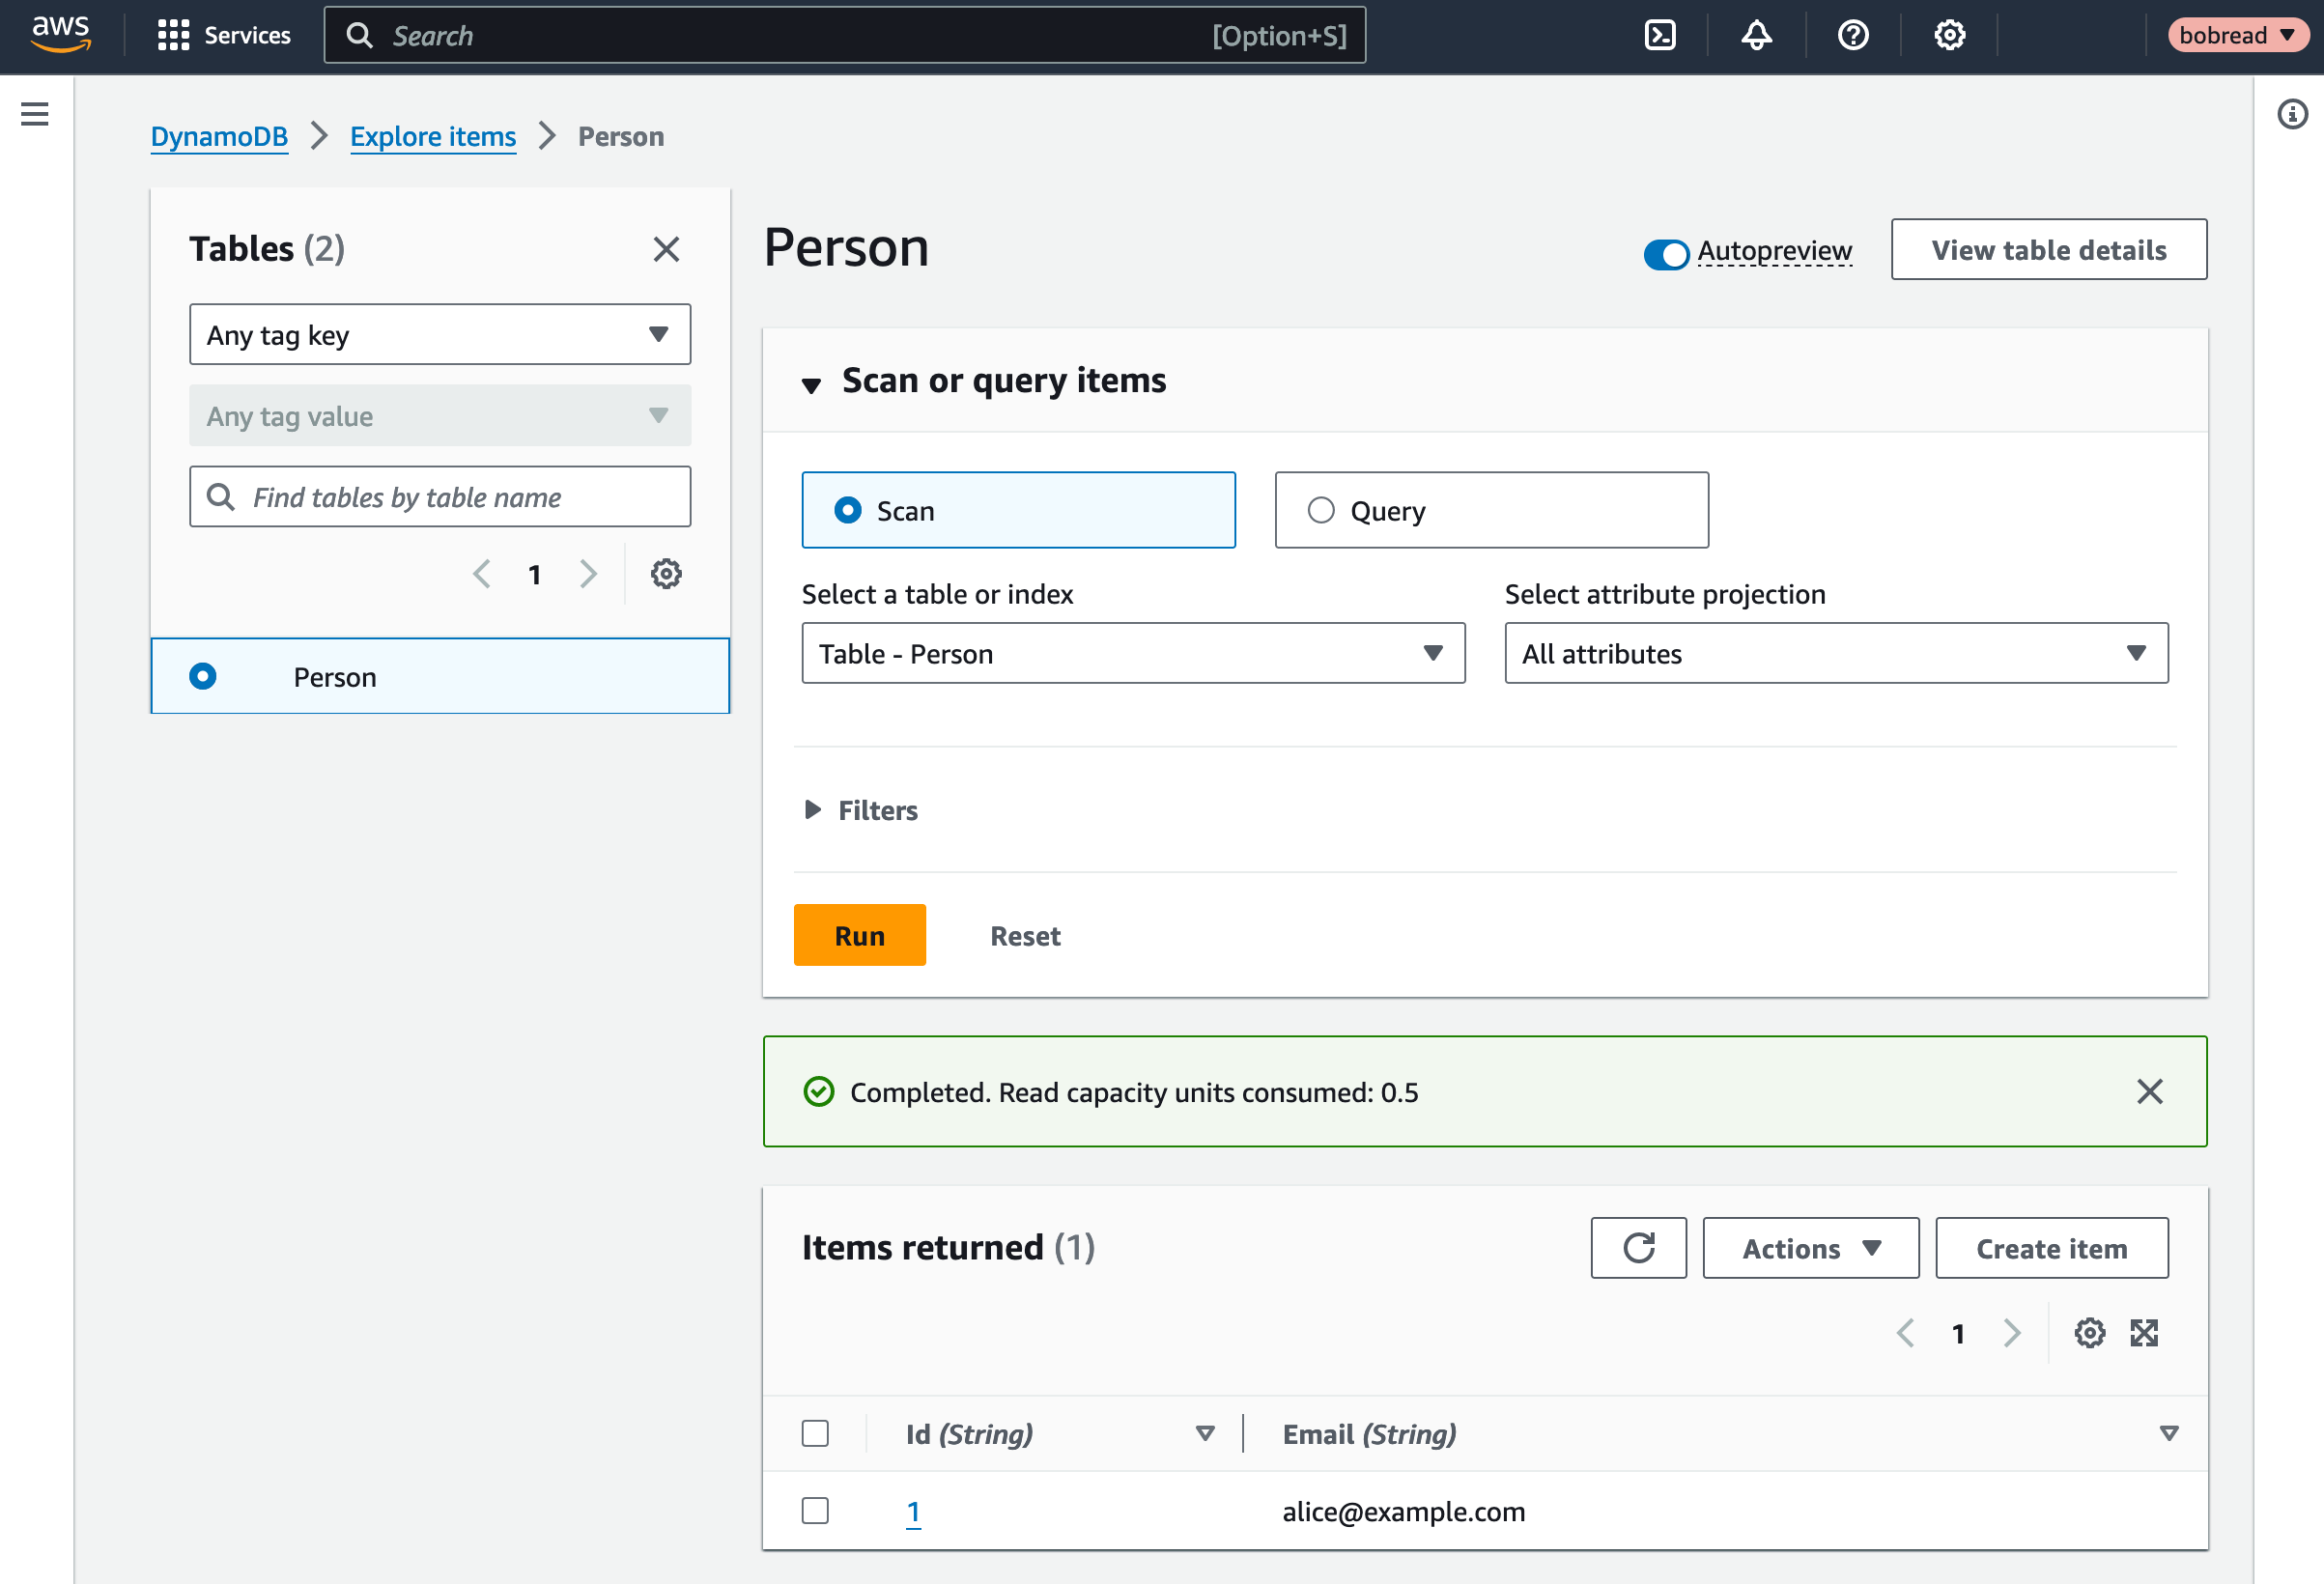
When he's done, Bob can click Switch back under his username at the top right.
How to limit Bob's access to the table?
If Bob doesn't need permanent access to the table, the administrator will want to remove Bob's permissions once he has read the data he needs. There are various ways of doing this:
- Set a calendar reminder to manually log in and delete
bobreader, possibly after emailing Bob to check that he's done. This approach leaves a lot of room for human error. - Create a custom script using AWS Lambda, CloudTrail, and CloudWatch, that triggers when Bob assumes the
readerrole and deletesbobreader. This is too much work, since user access is a common request. - Set the date the policy ends. Bob will be able to assume the role as many times as he wants before this time. This is the simplest and most secure way of assigning temporary access. To do this, you can add a date a few days in the future to
bobreader:"Condition": {"DateLessThan": {"aws:CurrentTime": "2023-11-06T23:59:59Z"}}
If you don't revoke user access when no longer needed, users' permissions will expand indefinitely, leading to potential privacy and confidentiality problems.
Use Terraform to manage users
In this section, we will repeat what we did in the previous section on AWS, but we'll use Terraform instead. We will create a user called Carol and a role she can assume to read the DynamoDB table.
Create an administrator in IAM
If you completed the earlier section and have the user Bob, please go to his user in the AWS console and add the new permission AdministratorAccess. Since you noted his access key, you can use it in the AWS CLI, now that Bob is an administrator. Also, browse to your DynamoDB Person table and delete it, as we will recreate it with Terraform.
If you didn't complete the earlier section, please create a new AWS user with the AdministratorAccess permission and an access key for them.
Install Terraform
We need a temporary place to work on files for this tutorial. Make any folder on your computer, like temp, and open a terminal inside it.
You're welcome to install AWS and Terraform manually on your machine, following the instructions on their websites, but a faster way is to use Docker. Create a file called Dockerfile with the following content:
FROM alpine:3.18.4WORKDIR /workspaceRUN apk add aws-cli terraform
Build the container and start it:
docker build -t cloudbox_image .docker run -it --volume .:/workspace --name cloudbox cloudbox_image
You are now inside the Docker container and able to use AWS and Terraform:
aws --versionterraform -v
If you exit the container and wish to start it again later, run:
docker start -ai cloudbox
The --volume .:/workspace parameter shares your current folder with the container, so both your physical machine and Docker can read and write the same files.
Set AWS credentials
In the Docker terminal, set your administrator access key:
aws configure# enter your user access key# enter your user secret key
To test that your credentials are correct, you can run:
aws s3 ls
Create a database
Next, we will start on a Terraform configuration file to provision our AWS infrastructure.
Create a file called main.tf in your shared workspace folder. Add the content below, written in HashiCorp Configuration Language (HCL).
terraform { required_providers { aws = { source = "hashicorp/aws" version = "~> 4.16" } } required_version = ">= 1.2.0"}provider "aws" { region = "eu-west-1" }resource "aws_dynamodb_table" "person" { name = "Person" billing_mode = "PROVISIONED" read_capacity = 1 write_capacity = 1 hash_key = "Id" range_key = "Email" attribute { name = "Id" type = "S" } attribute { name = "Email" type = "S" }}
This infrastructure specification does only one thing: It creates a DynamoDB table called Person in the AWS Ireland region. Note that the AWS table name Person is separate from the Terraform resource name person. The latter can be whatever you want, and is used to refer to this resource anywhere in the Terraform configuration file.
Although AWS CLI is installed, Terraform still has to download its provider, since we used AWS in the configuration file. Run this command in the Docker terminal:
terraform init
The output will be:
/workspace # terraform initInitializing the backend...Initializing provider plugins...- Finding hashicorp/aws versions matching "~> 4.16"...- Installing hashicorp/aws v4.67.0...- Installed hashicorp/aws v4.67.0 (signed by HashiCorp)Terraform has created a lock file .terraform.lock.hcl to record the providerselections it made above. Include this file in your version control repositoryso that Terraform can guarantee to make the same selections by default whenyou run "terraform init" in the future.Terraform has been successfully initialized!You may now begin working with Terraform. Try running "terraform plan" to seeany changes that are required for your infrastructure. All Terraform commandsshould now work.If you ever set or change modules or backend configuration for Terraform,rerun this command to reinitialize your working directory. If you forget, othercommands will detect it and remind you to do so if necessary.
Terraform downloaded large files to .terraform. Remember to exclude them from version control if you use .gitignore.
To check that your configuration file syntax is correct, run:
terraform validate# Success! The configuration is valid.
Now let's create the database. Run:
terraform apply# type yes and push enter
The output should be:
Terraform used the selected providers to generate the following execution plan. Resource actions are indicated with the following symbols: + createTerraform will perform the following actions: # aws_dynamodb_table.person will be created + resource "aws_dynamodb_table" "person { + arn = (known after apply) + billing_mode = "PROVISIONED" + hash_key = "Id" + id = (known after apply) + name = "Person" + range_key = "Email" + read_capacity = 1 + stream_arn = (known after apply) + stream_label = (known after apply) + stream_view_type = (known after apply) + tags_all = (known after apply) + write_capacity = 1 + attribute { + name = "Email" + type = "S" } + attribute { + name = "Id" + type = "S" } }Plan: 1 to add, 0 to change, 0 to destroy.Do you want to perform these actions? Terraform will perform the actions described above. Only 'yes' will be accepted to approve. Enter a value: yesaws_dynamodb_table.person: Creating...aws_dynamodb_table.person: Creation complete after 10s [id=Person]Apply complete! Resources: 1 added, 0 changed, 0 destroyed.
You have successfully created a new database table.
Note that Terraform created the file terraform.tfstate to represent and track your AWS configuration. If any resource, like another database table, exists in AWS but was not created by Terraform, Terraform will not manage it. Terraform does not modify resources that are not in the state file. You can use the import command to include existing AWS infrastructure in your Terraform configuration or use an app like Terraformer.
Add a row to the table
To check that the table works, let's add a row:
aws dynamodb put-item \ --table-name Person \ --item '{ "Id": {"S": "1"}, "Email": {"S": "alice@example.com"} }'
If you browse to the database in the AWS console and click Explore table items, you can now see the new row.
Create a user
Add the following code to main.tf to add a user called Carol and give her a CLI access key.
resource "aws_iam_user" "carol" { name = "carol"}resource "aws_iam_access_key" "carol_key" { user = aws_iam_user.carol.name}
Run terraform apply.
The output is:
/workspace # terraform applyaws_dynamodb_table.person2: Refreshing state... [id=Person2]Terraform used the selected providers to generate the following execution plan. Resource actions are indicated with the following symbols: + createTerraform will perform the following actions: # aws_iam_access_key.carol_key will be created + resource "aws_iam_access_key" "carol_key" { + create_date = (known after apply) + encrypted_secret = (known after apply) + encrypted_ses_smtp_password_v4 = (known after apply) + id = (known after apply) + key_fingerprint = (known after apply) + secret = (sensitive value) + ses_smtp_password_v4 = (sensitive value) + status = "Active" + user = "carol" } # aws_iam_user.carol will be created + resource "aws_iam_user" "carol" { + arn = (known after apply) + force_destroy = false + id = (known after apply) + name = "carol" + path = "/" + tags_all = (known after apply) + unique_id = (known after apply) }Plan: 2 to add, 0 to change, 0 to destroy.Do you want to perform these actions? Terraform will perform the actions described above. Only 'yes' will be accepted to approve. Enter a value: yesaws_iam_user.carol: Creating...aws_iam_user.carol: Creation complete after 2s [id=carol]aws_iam_access_key.carol_key: Creating...aws_iam_access_key.carol_key: Creation complete after 1s [id=AKIAQSCRAQJDWEEF5AEL]Apply complete! Resources: 2 added, 0 changed, 0 destroyed.
Carol's access key and secret are now in the terraform.tfstate file. Now we can use her keys to log in to AWS using the CLI and see if we can access the Person table. Instead of rerunning aws configure and changing your default credentials, let's pass Carol's keys into the CLI for one command. In the Docker terminal, run the command below, replacing the keys in single quotes:
AWS_ACCESS_KEY_ID='<Carol's access key>' AWS_SECRET_ACCESS_KEY='<Carol's secret access key>' aws s3 ls
As expected, Carol does not yet have access.
An error occurred (AccessDenied) when calling the ListBuckets operation: Access Denied
Create a role
Add the following code to your main.tf file to create a role with access to the DynamoDB table that Carol can assume. Update the Principal with your AWS account number.
resource "aws_iam_role" "dbreader" { name = "dbreader" assume_role_policy = jsonencode({ Version = "2012-10-17", Statement = [ { Action = "sts:AssumeRole", Effect = "Allow", Principal = { "AWS": "arn:aws:iam::<Your Account Number>:root" }, Condition: { } }, ], })}resource "aws_iam_role_policy_attachment" "dbreader_dynamodb_readonly" { role = aws_iam_role.dbreader.name policy_arn = "arn:aws:iam::aws:policy/AmazonDynamoDBReadOnlyAccess"}
The first resource creates the role for your account with an expiry date. The second resource is a permission to access DynamoDB, with a link to the AWS resource name of the Terraform role called dbreader created above. This is an example of how Terraform configuration files abstract the details of the underlying cloud provider: We're using the config file name of the resource, not the AWS name.
Run terraform apply.
Request access to the database
We now have a role with permission to read the database and a user, Carol. But Carol does not have permissions to assume roles. If she wants to access the Person table, she must ask an AWS administrator at your company for access.
As the administrator, you need to add the code below to the configuration file to give Carol permissions to the role and run terraform apply again. Update the DateLessThan value to tomorrow.
data "aws_iam_policy_document" "carol_assume_role_policy" { statement { actions = ["sts:AssumeRole"] resources = [aws_iam_role.dbreader.arn] condition { test = "DateLessThan" variable = "aws:CurrentTime" values = ["2023-11-08T23:59:59Z"] } }}resource "aws_iam_policy" "carol_assume_dbreader_policy" { name = "CarolAssumeDbReaderPolicy" policy = data.aws_iam_policy_document.carol_assume_role_policy.json}resource "aws_iam_user_policy_attachment" "carol_assume_role" { user = aws_iam_user.carol.name policy_arn = aws_iam_policy.carol_assume_dbreader_policy.arn}
Read the database with the user using the role in the CLI
Carol can now assume the dbreader role in the CLI. To see this, run the following command in the terminal, replacing your keys and account number:
AWS_ACCESS_KEY_ID='<Carol's access key>' AWS_SECRET_ACCESS_KEY='<Carol's secret access key>' aws sts assume-role --role-arn "arn:aws:iam::<ACCOUNT_ID>:role/dbreader" --role-session-name "CarolSession"
AWS will return temporary credentials that look like the below:
"Credentials": { "AccessKeyId": "IAQSCRAQJDTNAC", "SecretAccessKey": "ozJXhWZNrpPyvttxqV5HE5gzn", "SessionToken": "2luX2VjEIn//////////wEaCIMEYCIQCuOjdHxeoGsoIQiN+kooZVF+UOyBz8=", "Expiration": "2023-11-08T17:30:31+00:00" }, "AssumedRoleUser": { "AssumedRoleId": "AROAQSCRAQJDQTYW57TM2:CarolSession", "Arn": "arn:aws:sts::08460:assumed-role/dbreader/CarolSession" }}
Run the following command for Carol to access the DynamoDB table, but use the access key and secret key returned in the session credentials above:
AWS_ACCESS_KEY_ID='<Session access key>' AWS_SECRET_ACCESS_KEY='<Session secret access key>' AWS_SESSION_TOKEN='<Session token></Session>' aws dynamodb scan --table-name Person --region eu-west-1
Be sure to remove newlines from your session token, or the command will fail. The output should be:
{ "Items": [ { "Id": { "S": "1" }, "Email": { "S": "alice@example.com" } } ], "Count": 1, "ScannedCount": 1, "ConsumedCapacity": null}
Terraform has successfully given Carol temporary access to read the table for Alice's email address. You can now manage users, resources, and permissions with Terraform.
Advantages and disadvantages of Terraform
In our example, the advantages of using Terraform over AWS alone are:
- It's faster to add text to a configuration file and run
applythan to use the AWS web console. ChatGPT can provide the correct syntax for any configuration you need. - Your configuration files are stored in code, and so can be verified for safety and run by automated tools in a build pipeline.
- Your AWS state is recorded in a state file, so you can see exactly what is live at any time without having to browse AWS.
The main disadvantage of Terraform is having to manage your terraform.tfstate file. Your Terraform state file must be kept safe, but not locally (because every administrator needs to use the latest version) and not in Git because it contains secrets. Include *.tfstate* in your .gitignore file.
Managing your Terraform state is a complicated topic. This article is a good starting point. You can split your state file into modules to make it easier to understand large configurations. You should also use GitHub secrets and Terraform variables instead of hard coding secrets into your configuration files. Secrets can be stored in AWS Parameter Store (free) or Secrets Manager (paid and more powerful).
Store your state file in a versioned online service specifically designed for secrets, like AWS S3 or Terraform Cloud. Read more about this here. Once you have a secure location for your state file, you can automate access to it with Atlantis. This free locally hosted app will use the latest version of your state file with Terraform apply when committing Git pull requests for infrastructure. You could also use a more powerful online service with paid features like Spacelift.
The other difficulty in our access example is the manual process required for a user to request database access from an administrator, and the potential for human error when the administrator grants expiring permissions.
What is Abbey and how does it make access to data easier?
Now that you know how to use Terraform, you are probably exhausted at the thought of managing hundreds of configuration file updates for user access requests. Luckily, there are a few services that are a level of abstraction above Terraform. Abbey is one example: A web application users can use to request access to cloud resources and administrators can use to approve requests. Permissions are automatically adjusted in your connected Terraform GitHub account and configured on AWS.
Let's use Abbey to assign a user to a group to see how it works. Once again, following this tutorial won't incur charges, as Abbey is free for the first twenty users. You will need to have Git installed and a GitHub account to follow this section.
Install Abbey
In the AWS web console for the IAM service, create a group called readergroup with the permission AmazonDynamoDBReadOnlyAccess.
Install Abbey:
- Register an account at https://accounts.abbey.io/sign-up.
- Under Settings → API Keys, create a new key.
- Browse to https://github.com/abbeylabs/abbey-starter-kit-aws-iam.
- Click Use this template → Create a new repository. This will create a copy of the repository in your GitHub account (unlike forking the repository, your copy won't have the original repository commit history).
- Make the repository private for safety and name it
abbeytest. - Clone the repository to your computer in the
workspace\abbeytestfolder.
Note that the Terraform list of starter kit repositories contains both abbey-starter-kit-terraform-cloud and abbey-starter-kit-aws-iam. Even though the AWS kits don't mention Terraform in their name, all kits use Terraform. Don't use the Terraform cloud kit, as that is a paid Terraform service.
Link Abbey to your GitHub repository
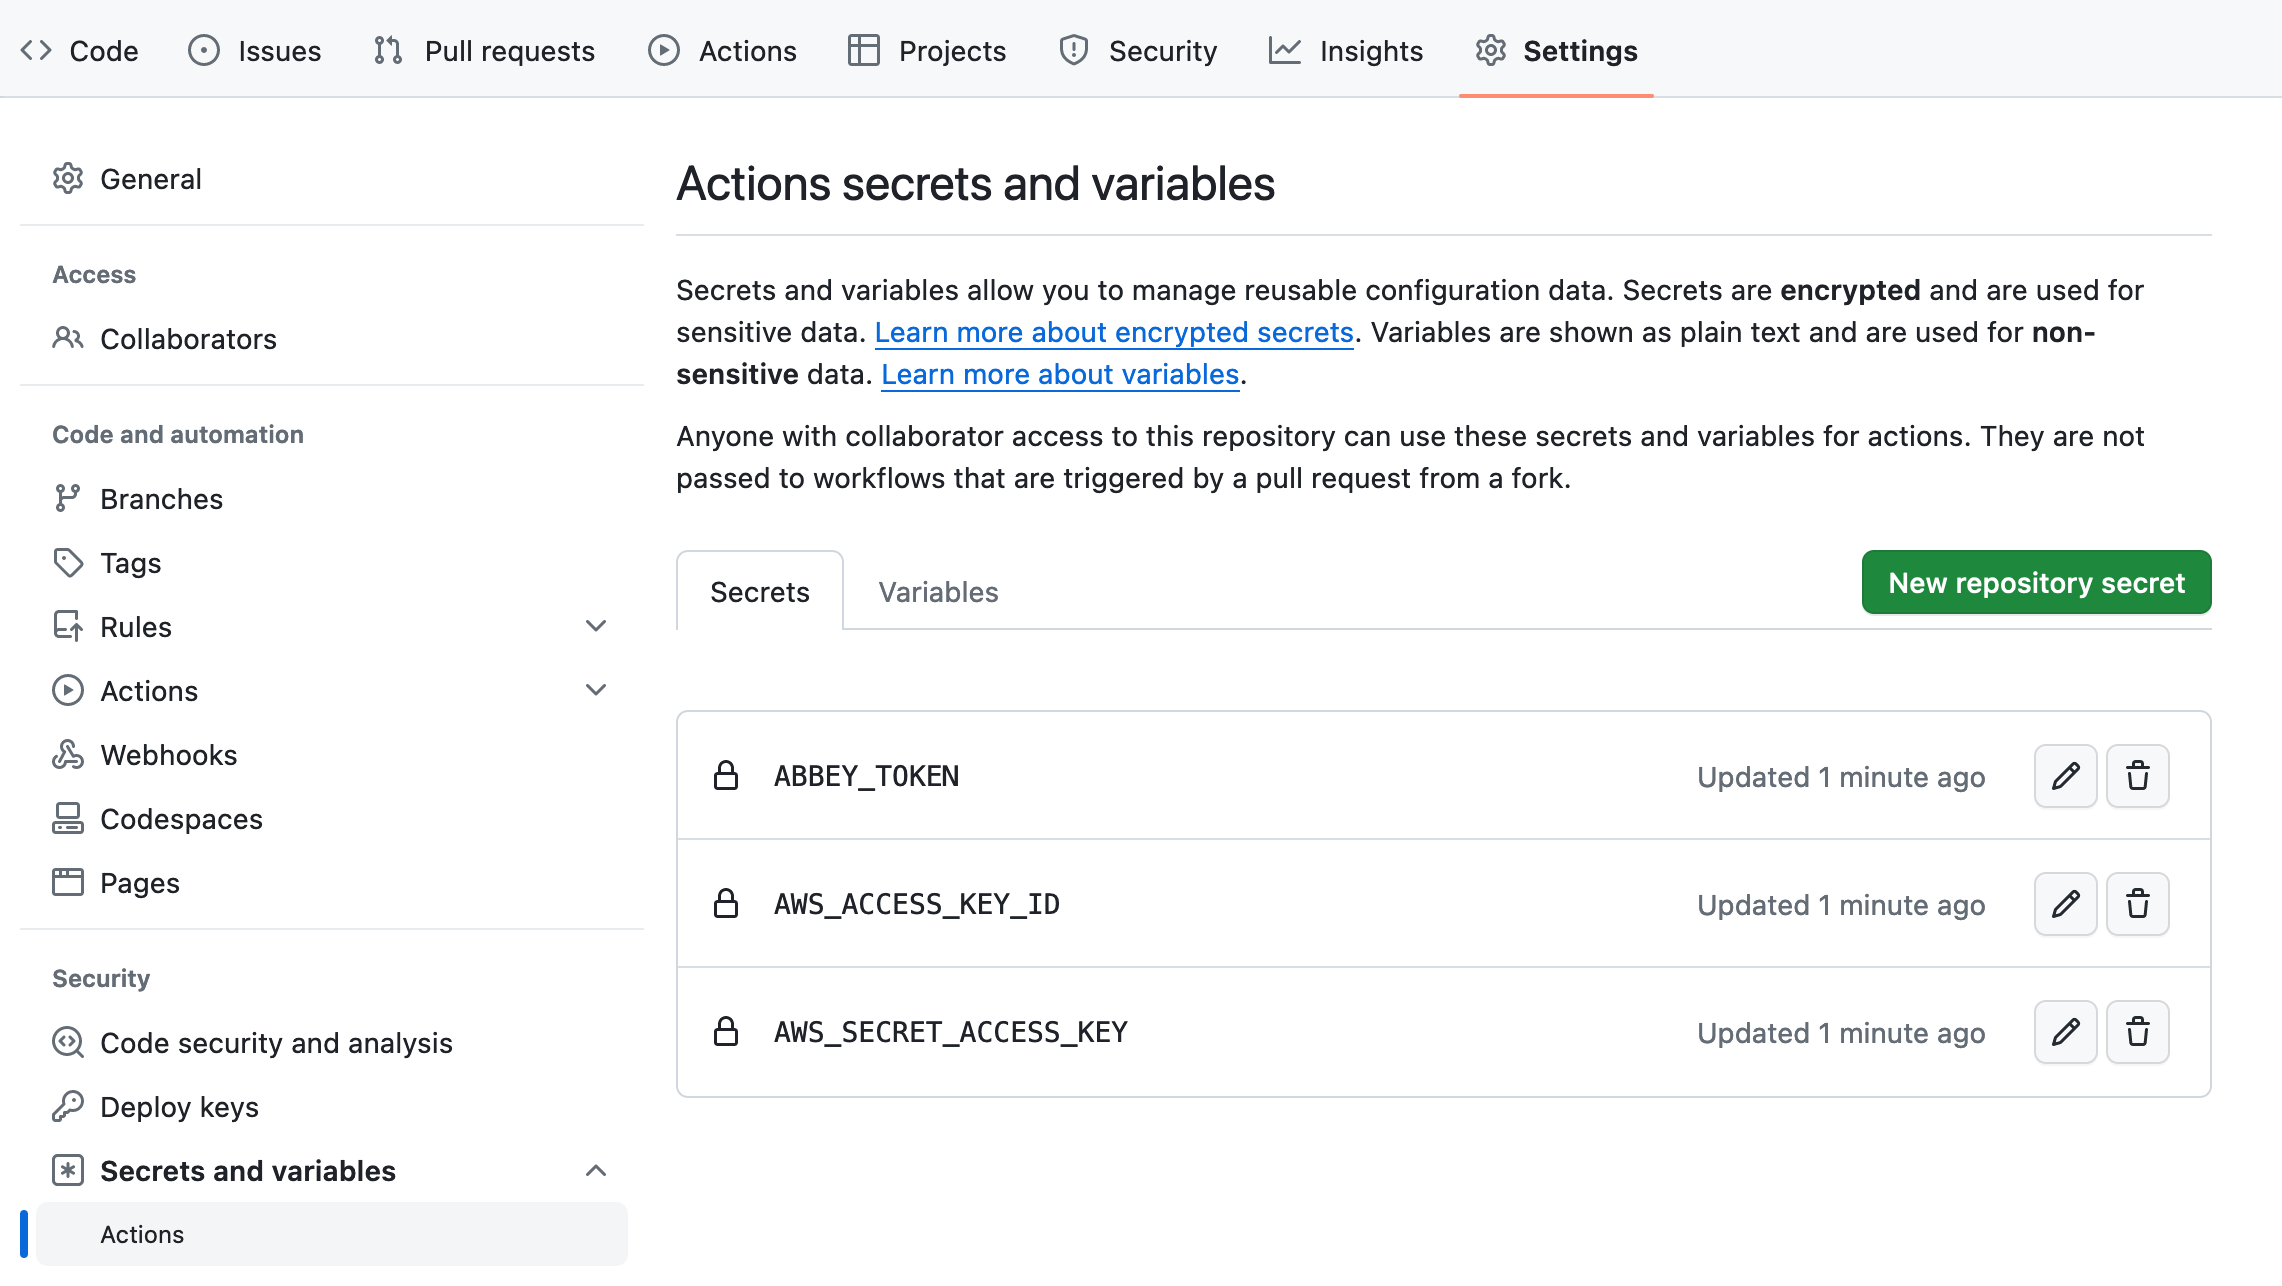
Add your AWS access keys to the GitHub repository.
-
Browse to your
abbeytestrepository and click the Settings tab. -
Click Secrets and variables → Actions.
-
Click New repository secret.
- Set the Name to
AWS_ACCESS_KEY_ID. - Set the Secret to your access key from earlier. (Remember, Bob is now an AWS administrator if you completed the first section.)
- Click Add secret.
- Set the Name to
-
Add two more secrets in a similar way:
AWS_SECRET_ACCESS_KEYset to Bob's secret key.ABBEY_TOKENset to the API key you created after registering on the Abbey website.
-
Browse to https://app.abbey.io/connections.
-
Click Create a Connection.
-
Name it
abbeytestand click Create. -
Select Only select repositories, select
abbeytest, and click Install & Authorize.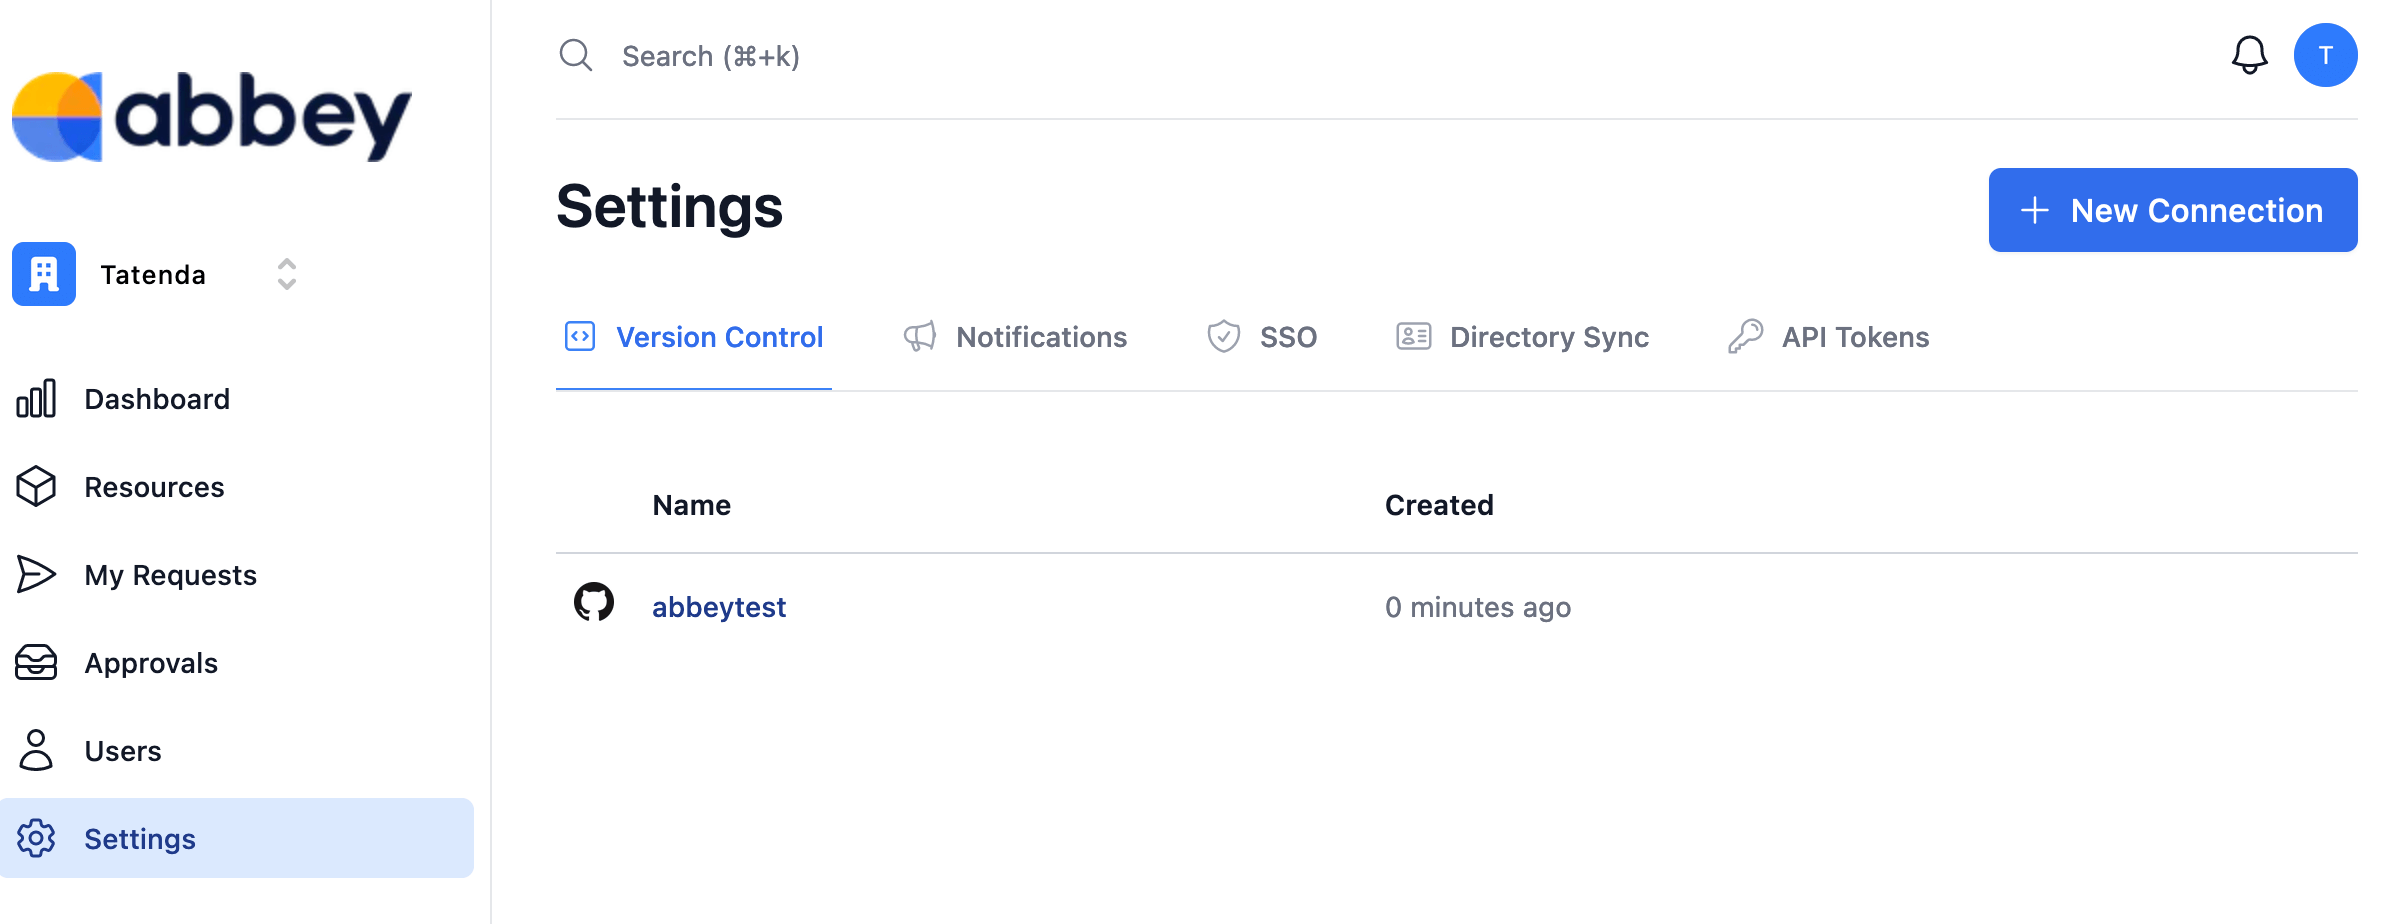
In the cloned repository, you have a new Terraform configuration file called workspace/abbeytest/main.tf. Open it and take a look. You can see that Abbey and AWS are present as Terraform providers at the top. The resource "abbey_grant_kit" "IAM_membership" { section makes up most of the configuration. A grant kit consists of:
- A name and description.
- A workflow, which can have several steps that regulate how access is given. In our file, it's a simple one-step approval by an administrator.
- A policy, which has conditions that can automatically deny a user access to a resource to save administrators time, or revoke access after a specified period. Automatic denial is useful if a user is not a member of a department or country with permission to access a specific resource. Policies don't use HCL, but rather the Open Policy Agent Rego format. Abbey servers will change your configuration files in GitHub and run Terraform at the date you specify to revoke access.
- An output, which describes what should happen if access is approved. In our file, Abbey gives access by adding a user to a group in the
access.tfconfiguration file.
At the bottom, the file contains resources. This could be a database or role. In our case, the resource is a user group.
Configure your AWS settings
Let's change this grant starter kit to match the particulars of your AWS account:
- Change the
providerto Ireland:provider "aws" { region = "eu-west-1" } - Above the
workflowstep of theresource, add apolicysection. Here we use the inline format for simplicity:policies = [{query = <<-EOTpackage commonimport data.abbey.functionsallow[msg] {functions.expire_after("5m")msg := "Grant access for 5 minutes."}EOT}] - Change
reviewersto the email address you used to register onaccounts.abbey.io:reviewers = { one_of = ["yourname@example.com"] } - Change the
outputlocationto theabbeytestGitHub repository URL:location = "github://yourname/abbeytest/access.tf" - Change the
user_1identity email to your Abbey email address. In this simple case, you're using the same email address for the reviewer (administrator) and the requester. In reality, you would add every employee in your organization as a separate user in this file with their own email address.abbey_account = "yourname@example.com" - Set the IAM name to Carol, the user you created in the previous section:
name = "carol"
- Set the group resource at the bottom of the file to
readergroup:data "aws_iam_group" "group1" { # <- don't change thisgroup_name = "readergroup" # <- change this} - Save the
main.tffile and commit and push to GitHub. - Browse to
https://github.com/<yourname>/abbeytest/actionsand see that the Abbey Terraform action ranapplywhen you committed.
Users in Abbey have their own identity, determined by their email address, separate from any identities they may use in AWS. You can add users to your Abbey account in bulk to save time. In order for Abbey to provide access, there needs to be a link between an Abbey identity (the email a user used to sign up with) and identifiers in other systems, such as an AWS User ID. Those links are defined via the abbey_identity Terraform resource.
Make an access request with Abbey
Abbey is now configured to manage access in your AWS account. Let's test this by getting Carol to request access to the database.
- Browse to https://app.abbey.io/resources.
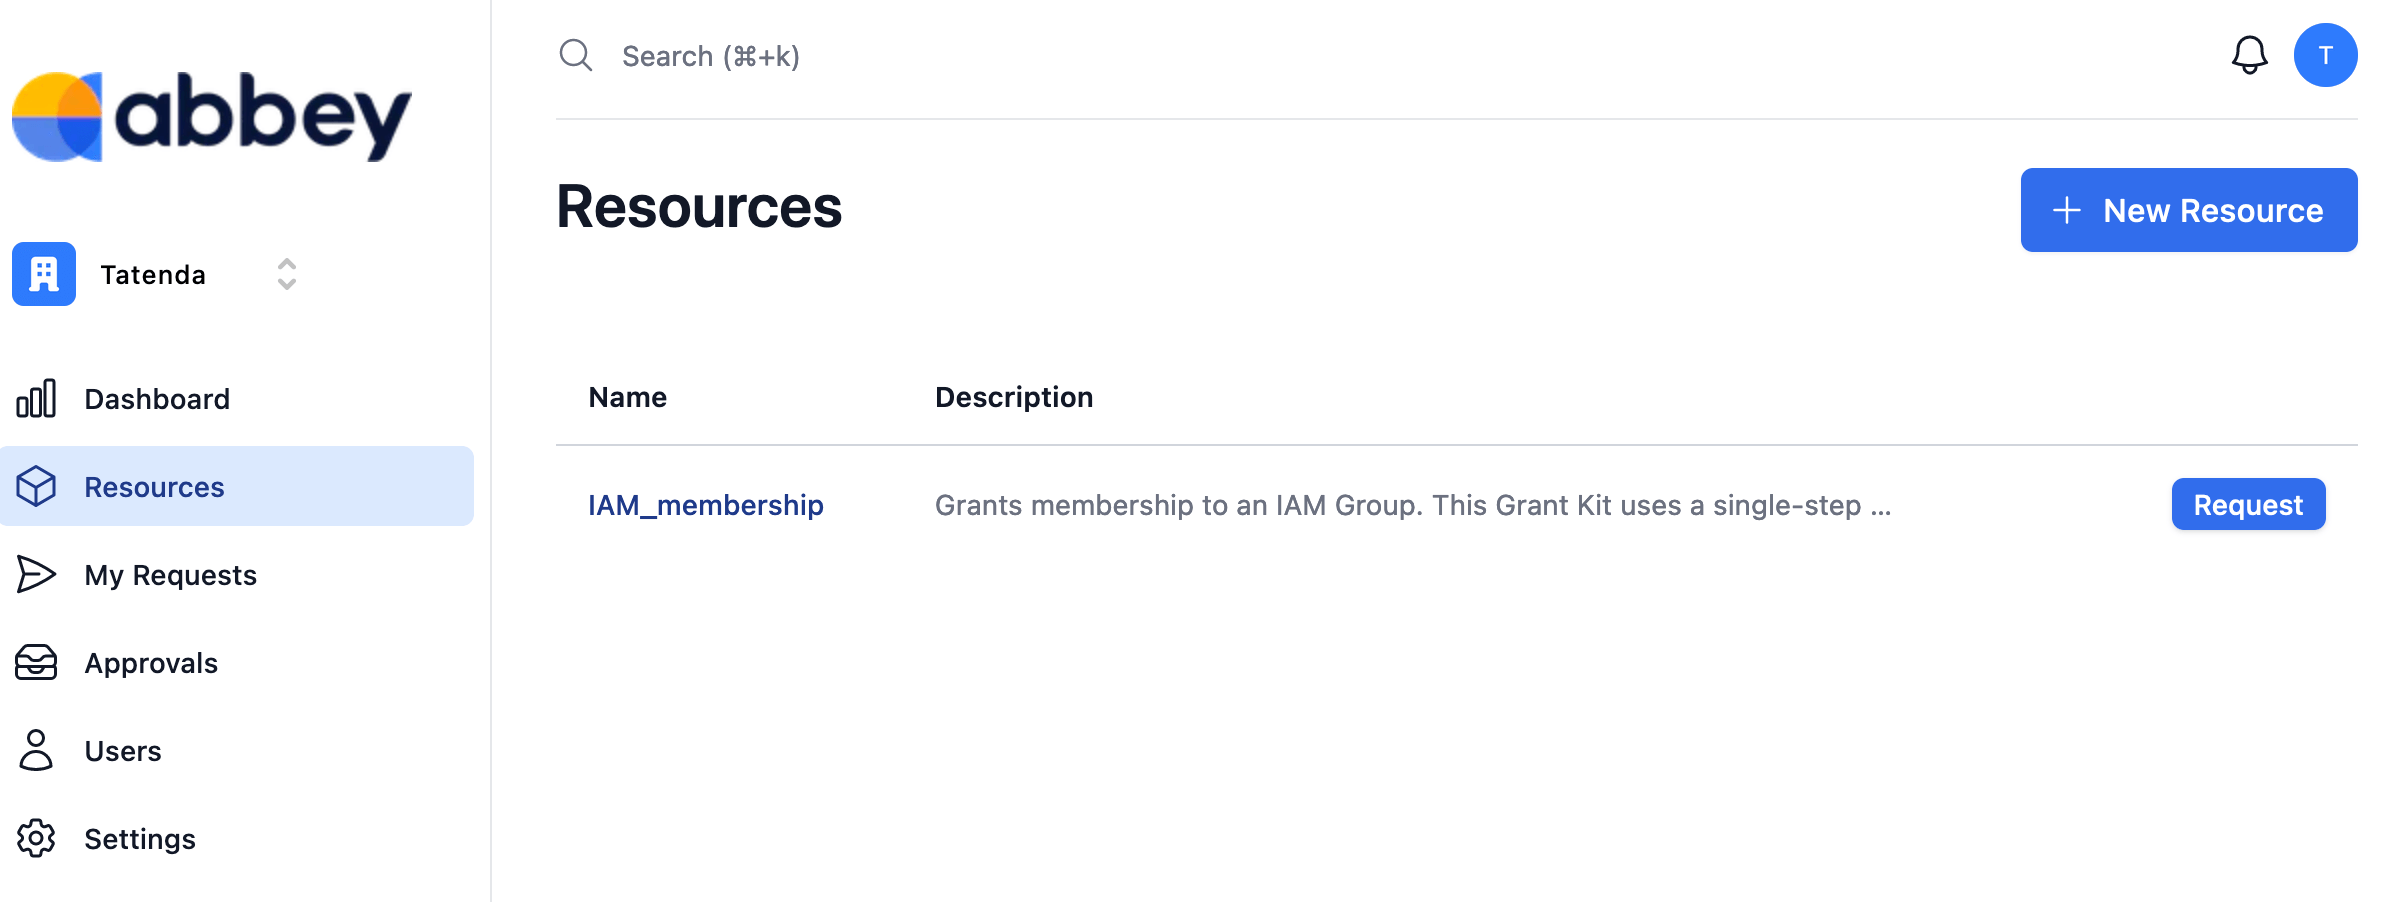
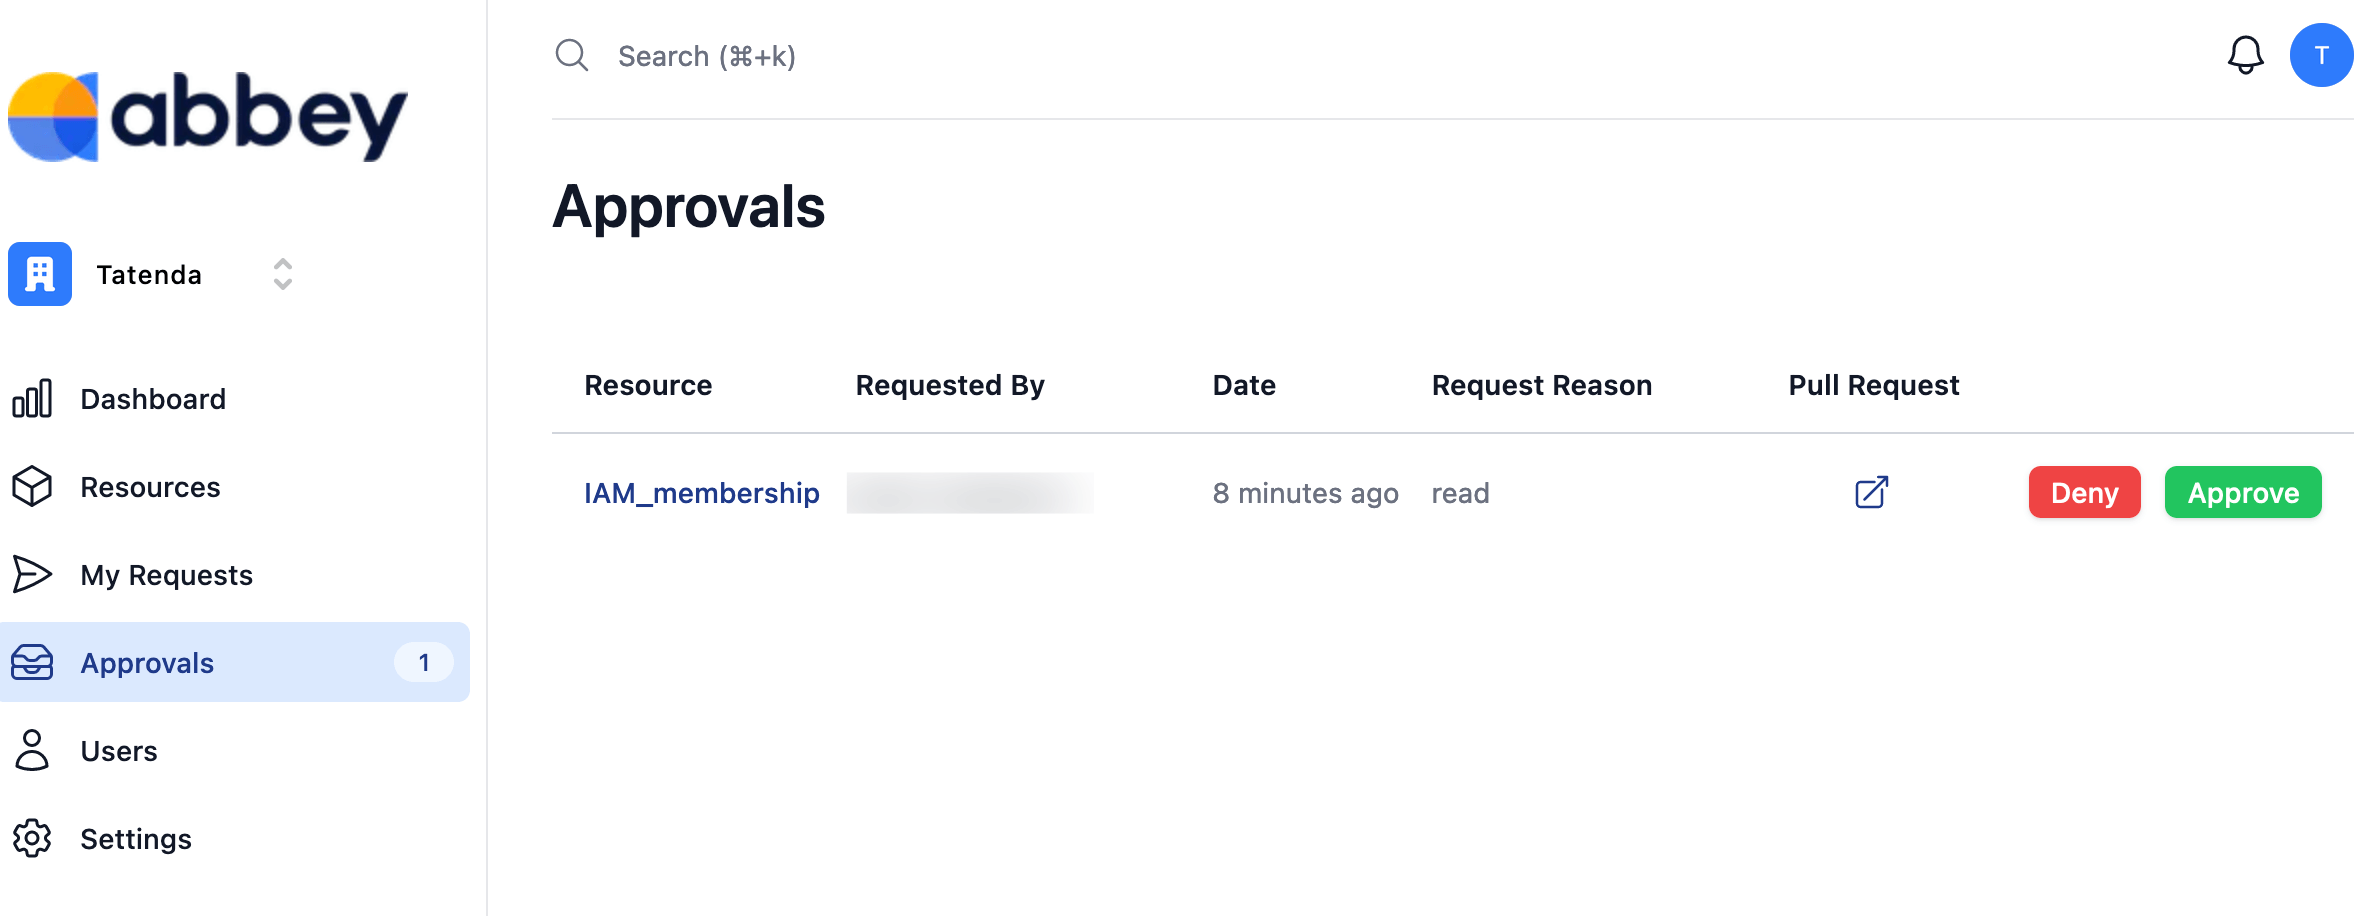
- Request access. You will receive an email for the GitHub pull request Abbey creates:
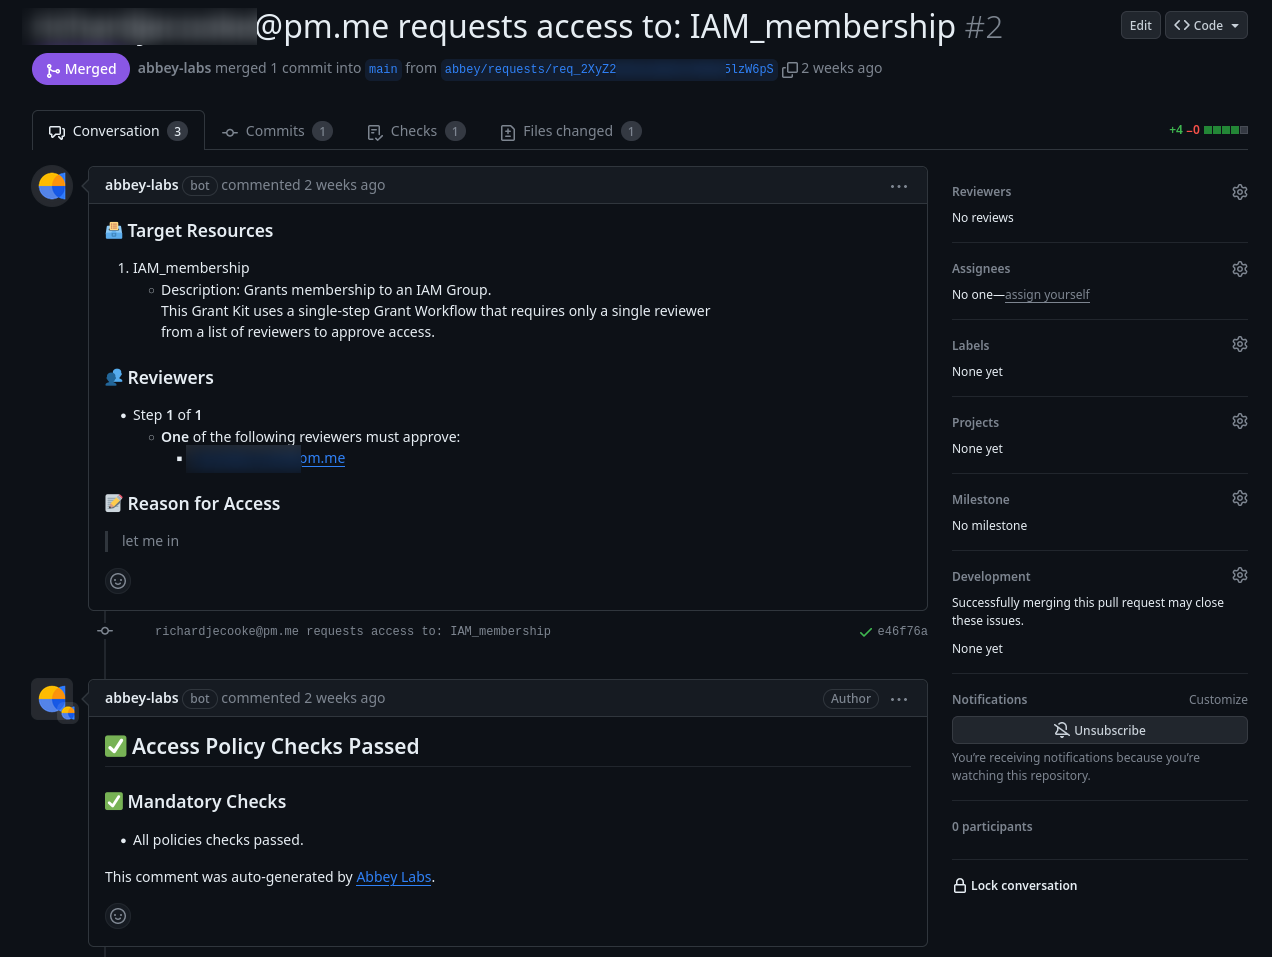
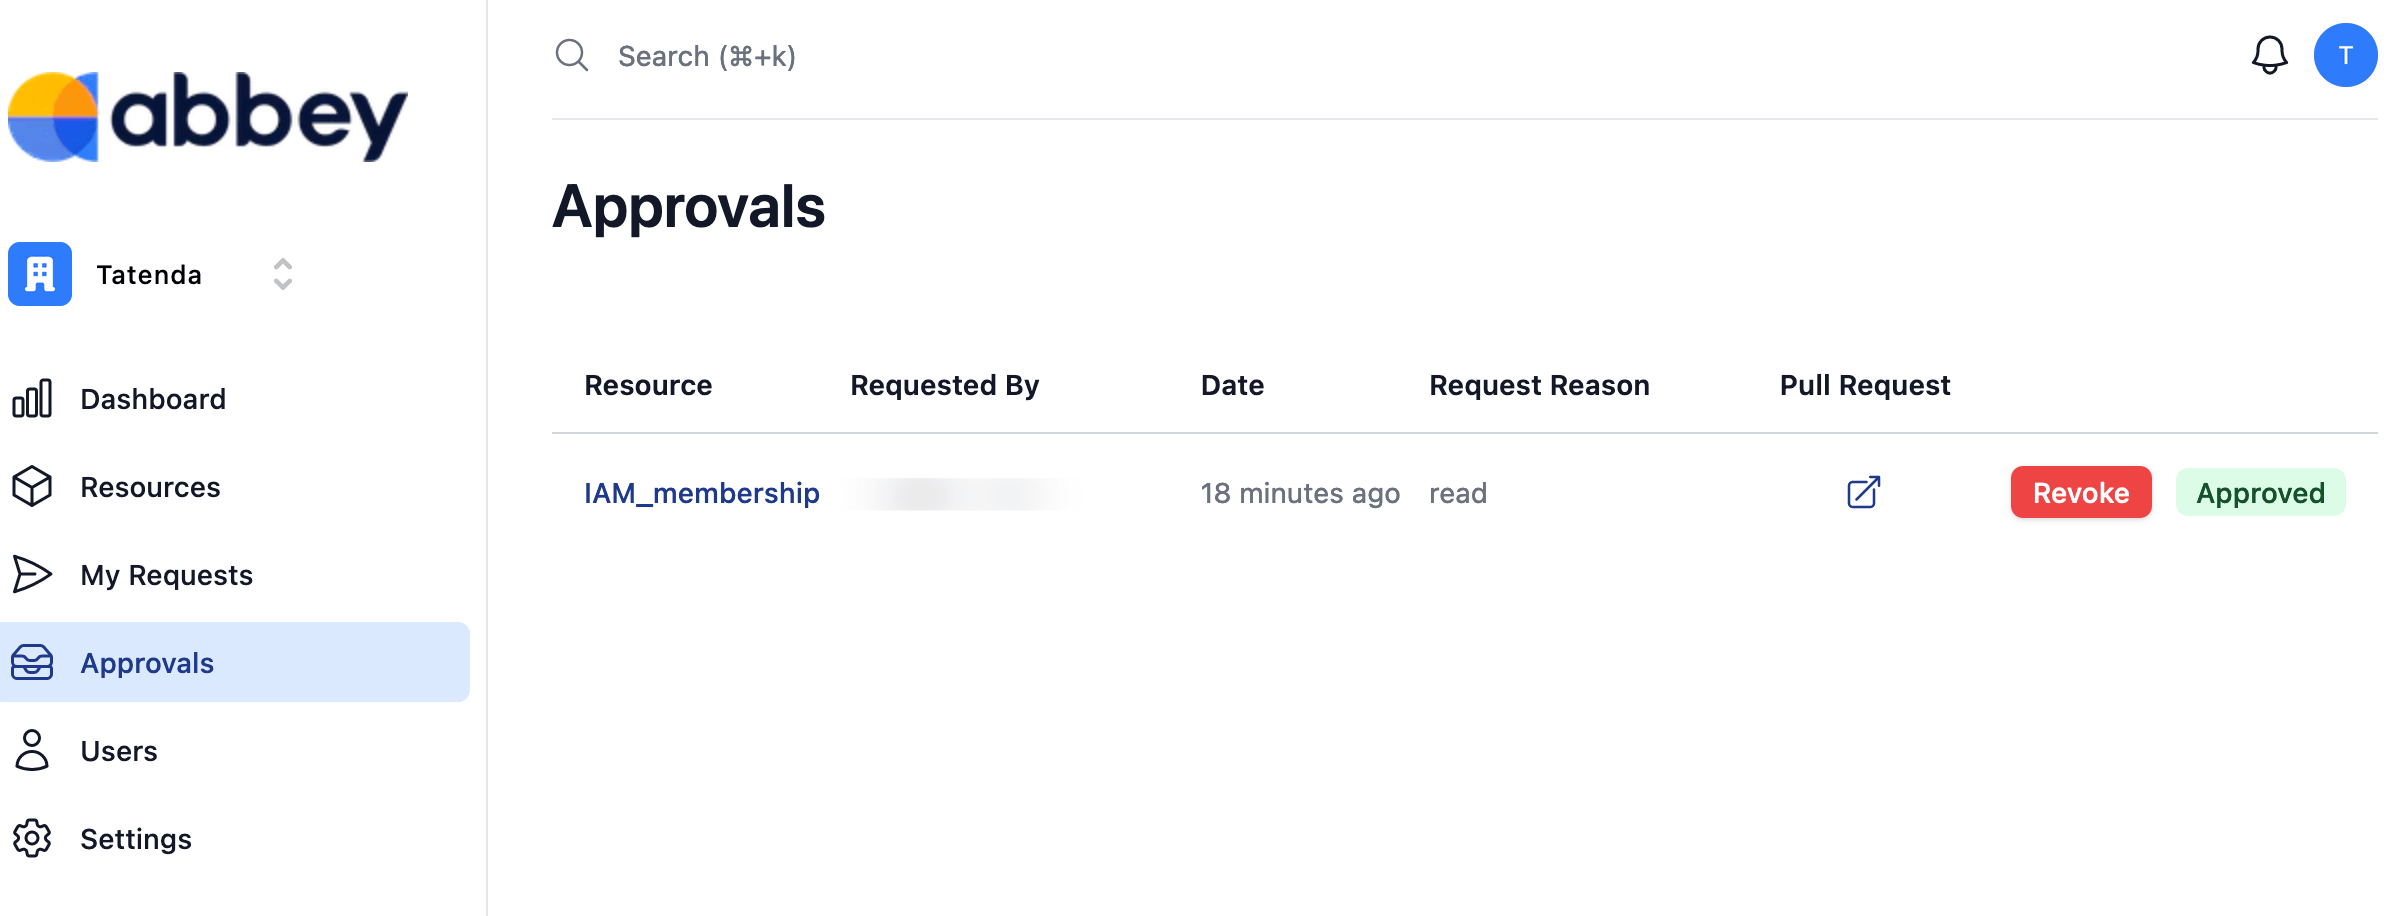
- In the Abbey Approvals screen, click Approve.
- The GitHub pull request will update:
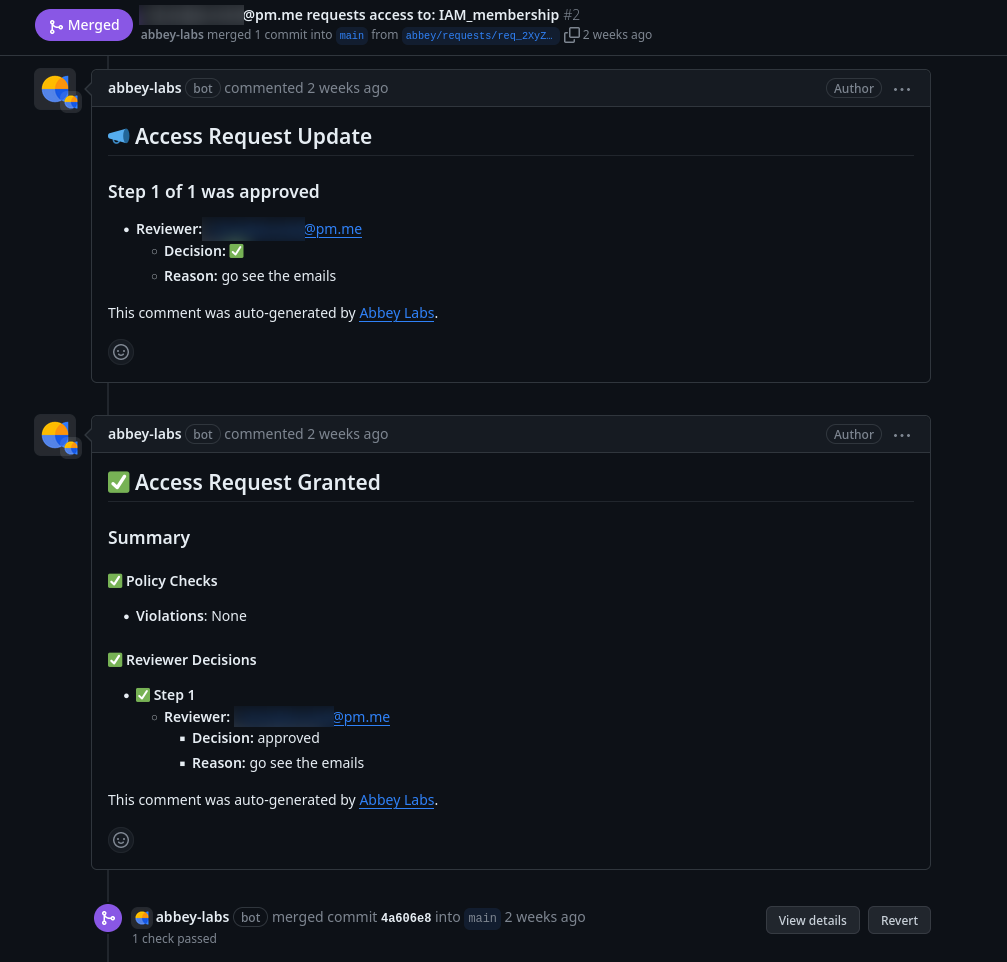
You can see the GitHub actions Abbey ran to add Carol to the group in your repository's Actions tab, https://github.com/YourName/abbeytest/actions.
Abbey makes access changes only through GitHub on commits. If you try to run Terraform locally, it will fail because you do not have a state file. Even running terraform init will fail because your Abbey key is not set:
Initializing the backend...Error refreshing state: HTTP remote state endpoint requires auth
Read the database with the user using the group in the CLI
Carol is now part of the readergroup. Check that she can read the database in the CLI:
AWS_ACCESS_KEY_ID='<Carol's access key>' AWS_SECRET_ACCESS_KEY='<Carol's secret access key>' aws dynamodb scan --table-name Person --region eu-west-1
If you update the abbeytest repository from GitHub, you'll see a new file called access.tf in the abbeytest repository. This is where Abbey maintains your access configuration:
resource "aws_iam_user_group_membership" "user_carol_group_readergroup" { user = "carol" groups = ["readergroup"]}
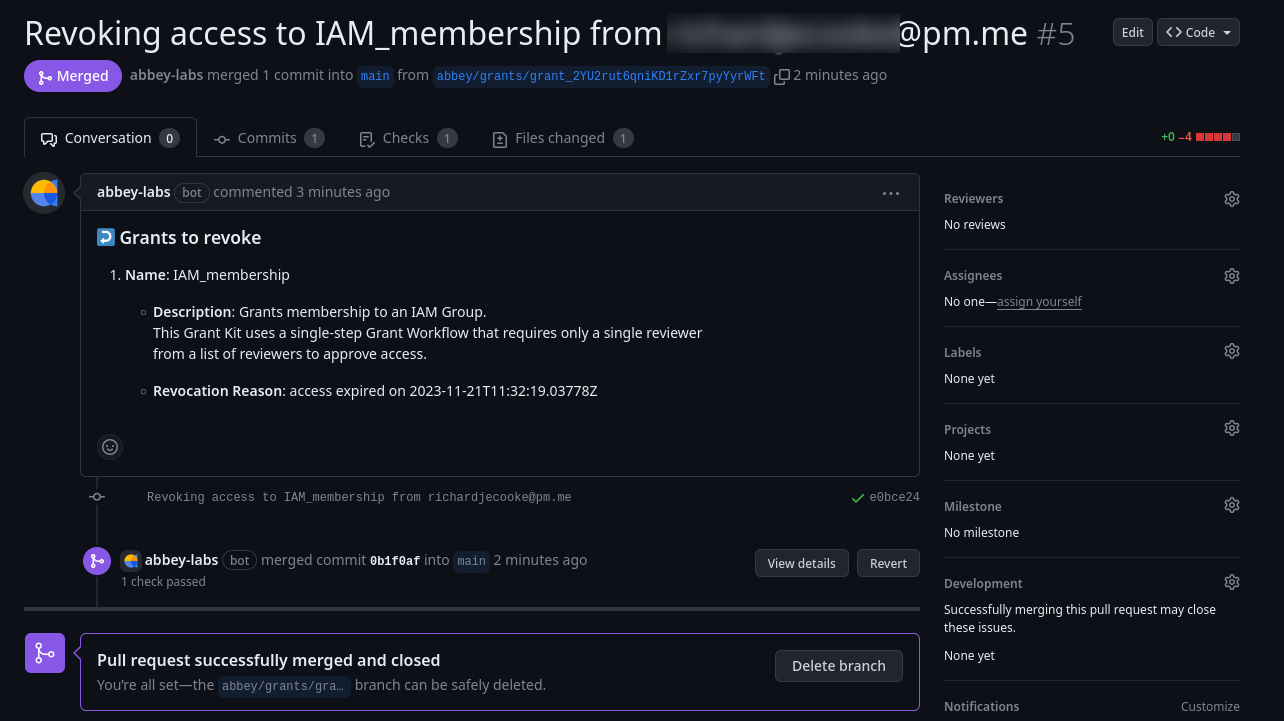
Revoke permissions
After five minutes have passed, Abbey will automatically revoke Carol's group membership, as per your policy. This will create a new GitHub commit:
The administrator could also manually remove her access at any time. To do this, in the Abbey Approvals screen, click Revoke.
You'll see that Carol can no longer read the database:
AWS_ACCESS_KEY_ID='<Carol's access key>' AWS_SECRET_ACCESS_KEY='<Carol's secret access key>' aws dynamodb scan --table-name Person --region eu-west-1
And abbeytest/access.tf will be blank again.
Delete your temporary administrator
If you've been following along with this tutorial, delete user Bob so that his administrator permissions cannot be exploited.
How exactly does Abbey work?
Abbey has two components:
- The Abbey web application.
- Your GitHub repository with the Terraform configuration files.
Users and administrators interact with the app to request, approve, and revoke access.
When you approve access with Abbey, the app commits code to the GitHub repository. This triggers a GitHub commit action to run terraform apply, using the Terraform state that is kept securely in the Abbey web server or wherever you chose to store it.
For more detail, see this video.
What things can I manage with Abbey?
Abbey specializes in linking resources to users. Use it for any and all access management, but leave the resource provisioning in plain Terraform code.
How does Abbey fit into my existing state files and GitHub repository for my project?
If you're new to Terraform, you might have added your main.tf file directory to your application Git repository. It's better to make a new repository for it, dedicated to infrastructure management.
You should also make another repository, so that you have one repository for infrastructure configuration and one for access configuration. If you prefer to use only one repository, you can split your Terraform files into separate modules.
Your configuration file main.tf can also be split into separate files for easier management. Terraform will use all the configuration files it has access to when updating your AWS state. As mentioned above, you can also use the main.tf file to define the links between your Abbey users and those in AWS. For larger projects that require more separation, you could instead do this in an identities.tf file in the access_manager directory.
Abbey Starter Kits default to storing the state file on the Abbey servers. Rather store your state file in a secure location, as discussed earlier.
Here's a simplified overview of this structure:
/project_root│├── /app│├── /infrastructure_manager│ ├── /.terraform│ │ └── /providers│ ├── /databases.tf│ └── /applications.tf│└── /access_manager (Abbey) ├── /access.tf └── /main.tf
Your terraform.tfstate will not be in any of these folders.
What are the benefits of Abbey over using Terraform alone?
- Simplicity: The initial configuration of Abbey will take 30 minutes, but after that, users can see all resources on a single page and request access in a single click, while administrators can grant it with another click.
- Auditing: Abbey stores all access requests and changes in your GitHub repository as pull requests, actions, and code merges. You can use this as a log of who had access to a resource at any point in time.
- Reduction of human error: Since granting access is automated, administrators no longer have to adjust Terraform configuration files manually and then apply them. This reduces the chance that access will be incorrectly set.
- Automated revocation: one of the most common security issues is that access does not get revoked as intended. By automating this process, you immediately close off an entire range of potential problems and make your systems far more secure.
What are the disadvantages of Abbey?
- Unlike Terraform or OpenTofu, Abbey has no free local version. Companies with more than twenty users need to pay for the service.
- You add another dependency to your infrastructure. However, you're not locked into Abbey. You can always make changes to the Terraform configuration manually.
If you ever want to stop using Abbey, you can simply unlink your Abbey account from your GitHub repository and return to managing your users manually with Terraform or AWS alone.
Running terraform state pull will download your state file from Abbey, like any remote server, so it's easy to try it out and see if it works for you without committing upfront.
Note that for simplicity our examples store state on Abbey itself, but we don't recommend this for production settings. Instead our customers usually "bring their own backend", whether that's Terraform Cloud or another Terraform collaboration tool like Atlantis or Spacelift.
Automate access management with Terraform today.
Abbey is the easiest way to add automated access request flows to your existing Terraform resources.
Improve security. Reduce toil. Simplify compliance.